On the surface, The Desk looks a simple standing desk: two legs and a table top. Deeper down, however, are several custom features that make it the most enjoyable place I’ve ever worked. Two years, several iterations of 3D printed parts, 100+ hours, and I’m mostly finished the conception, design, production and installation of my dream workspace.

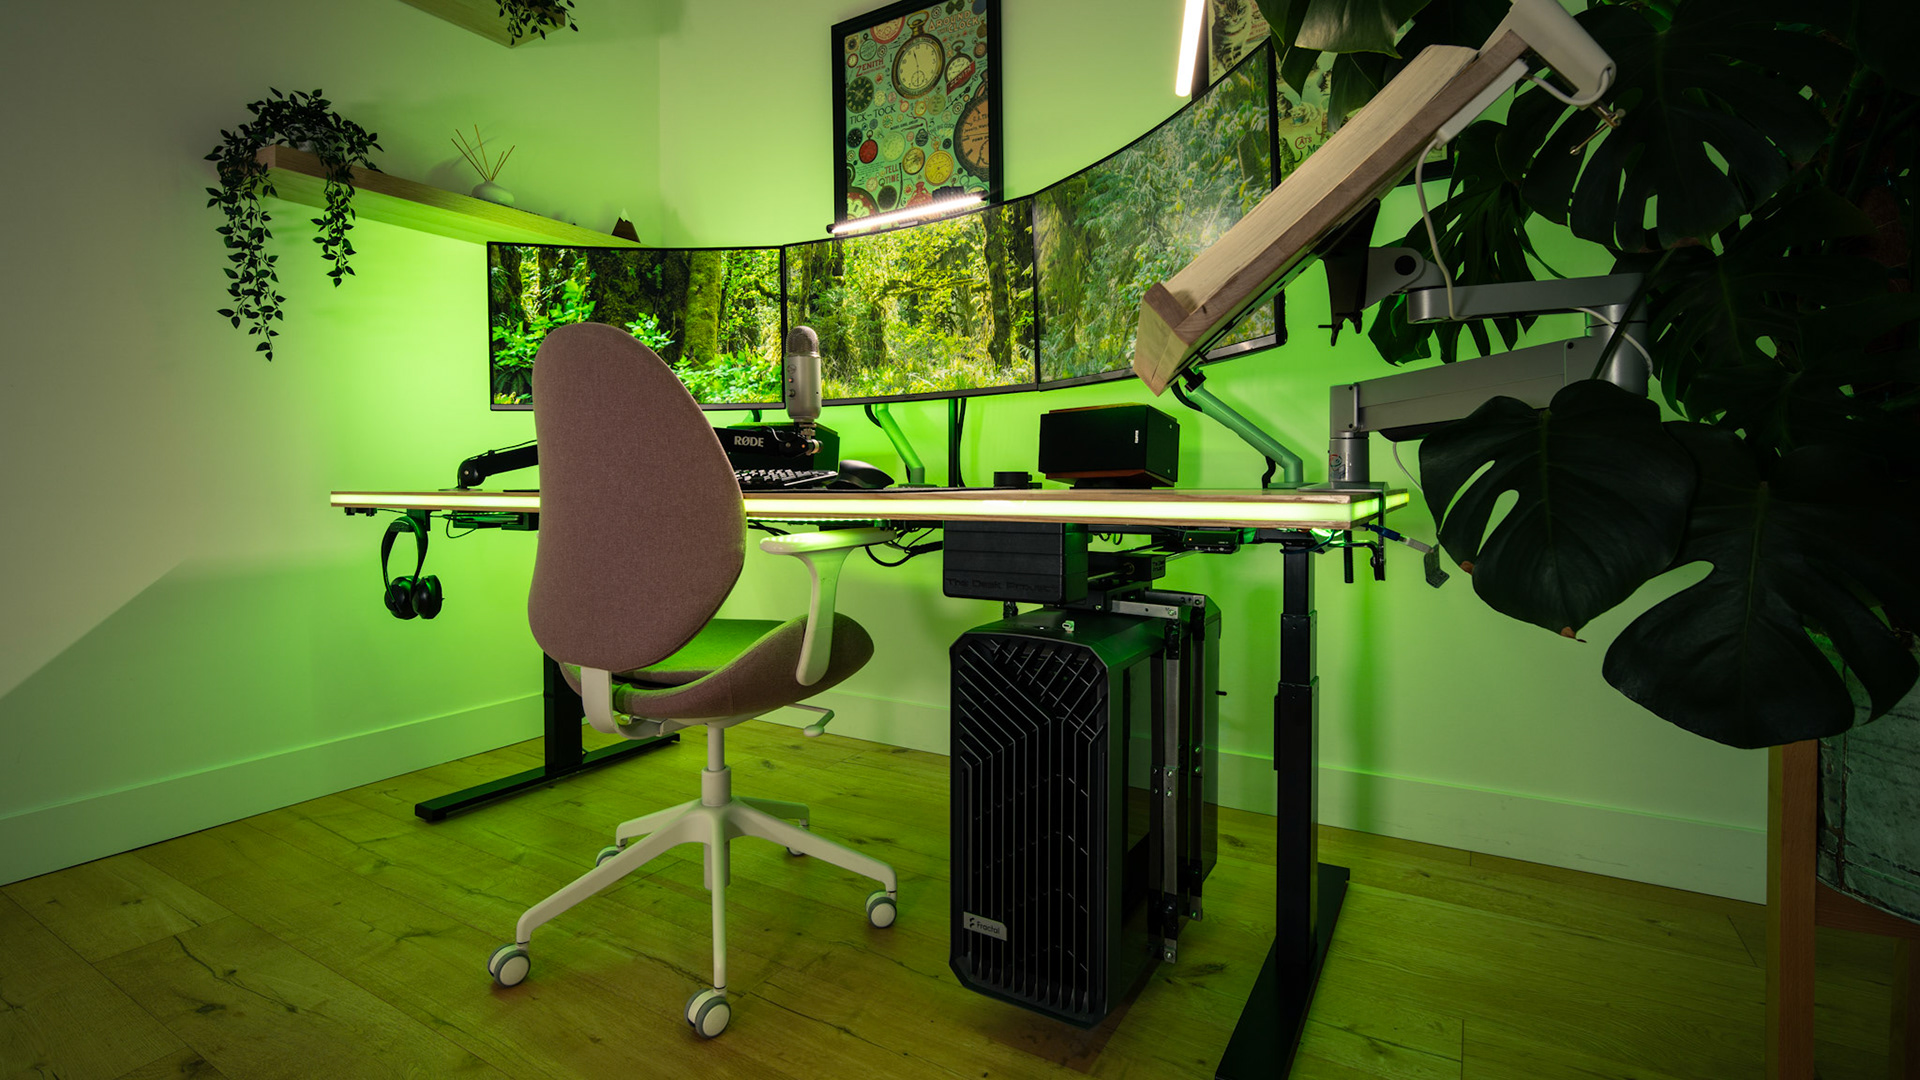
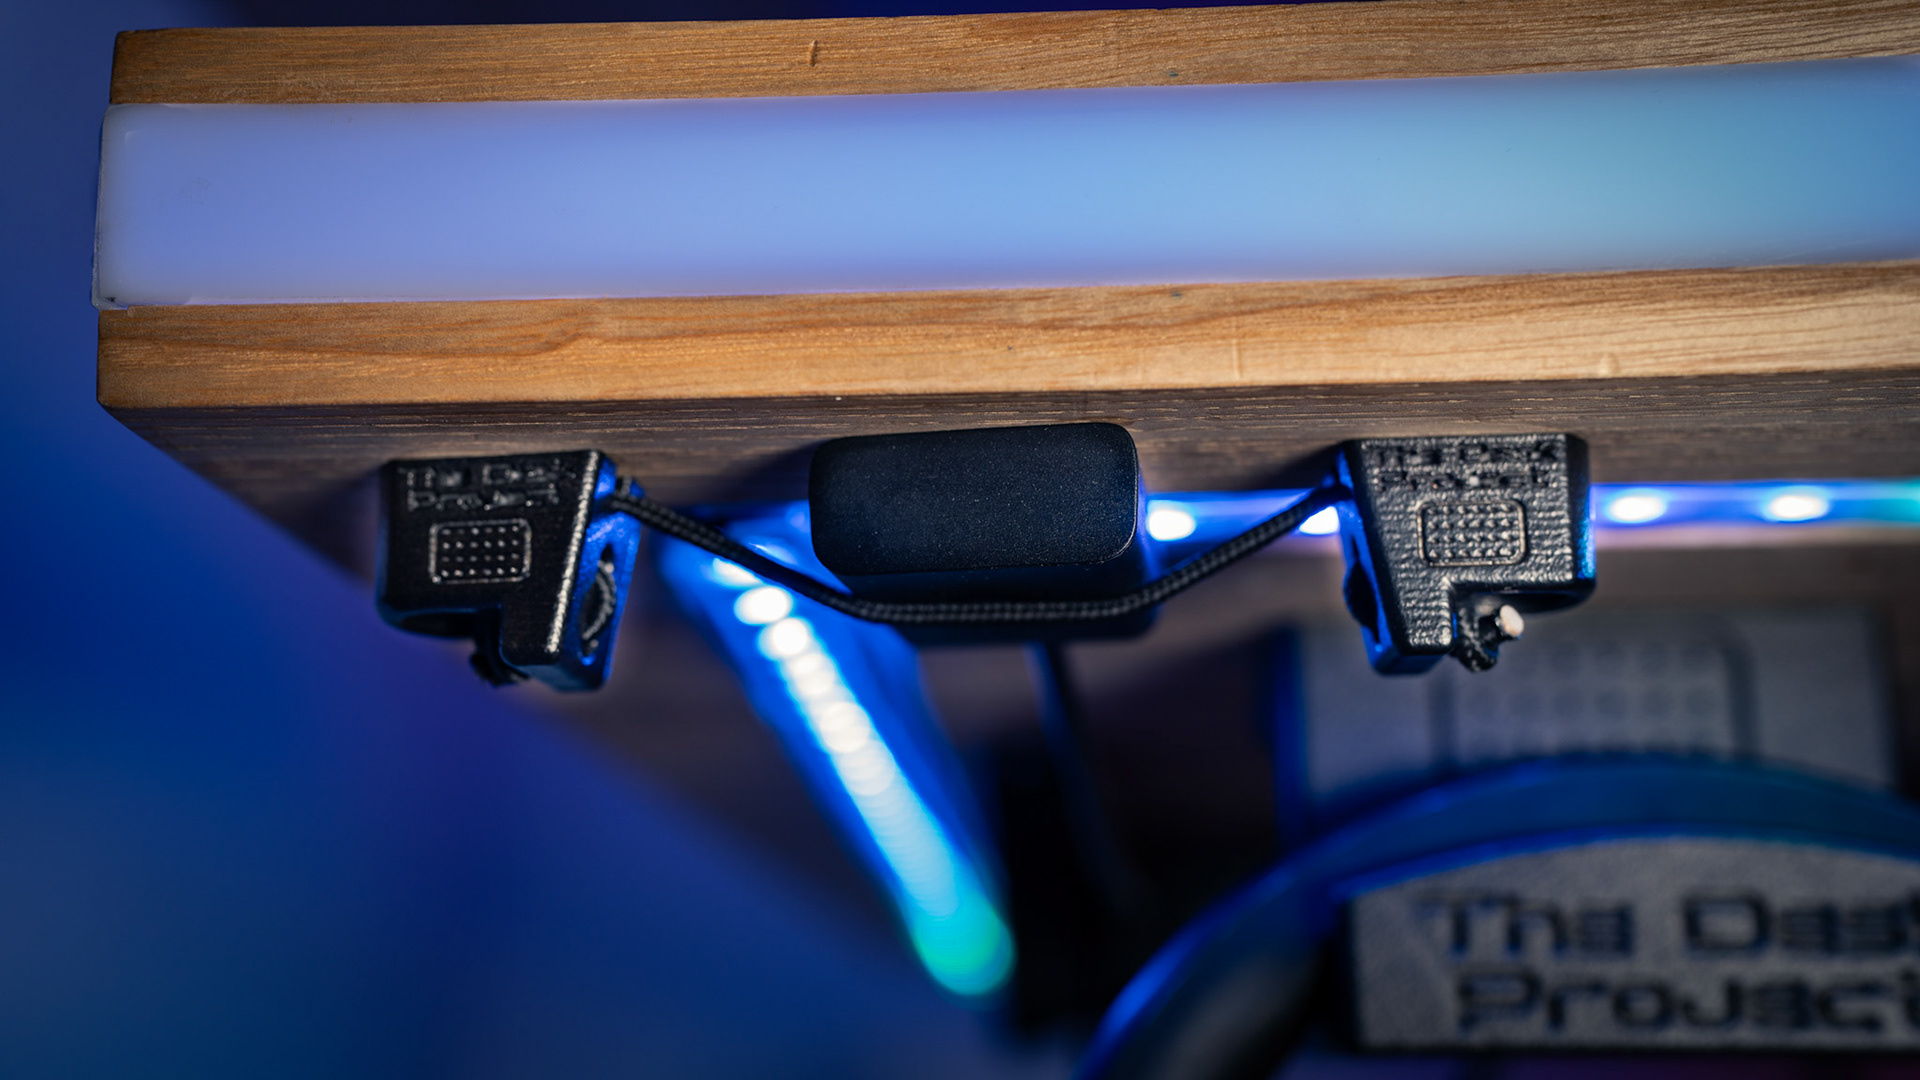
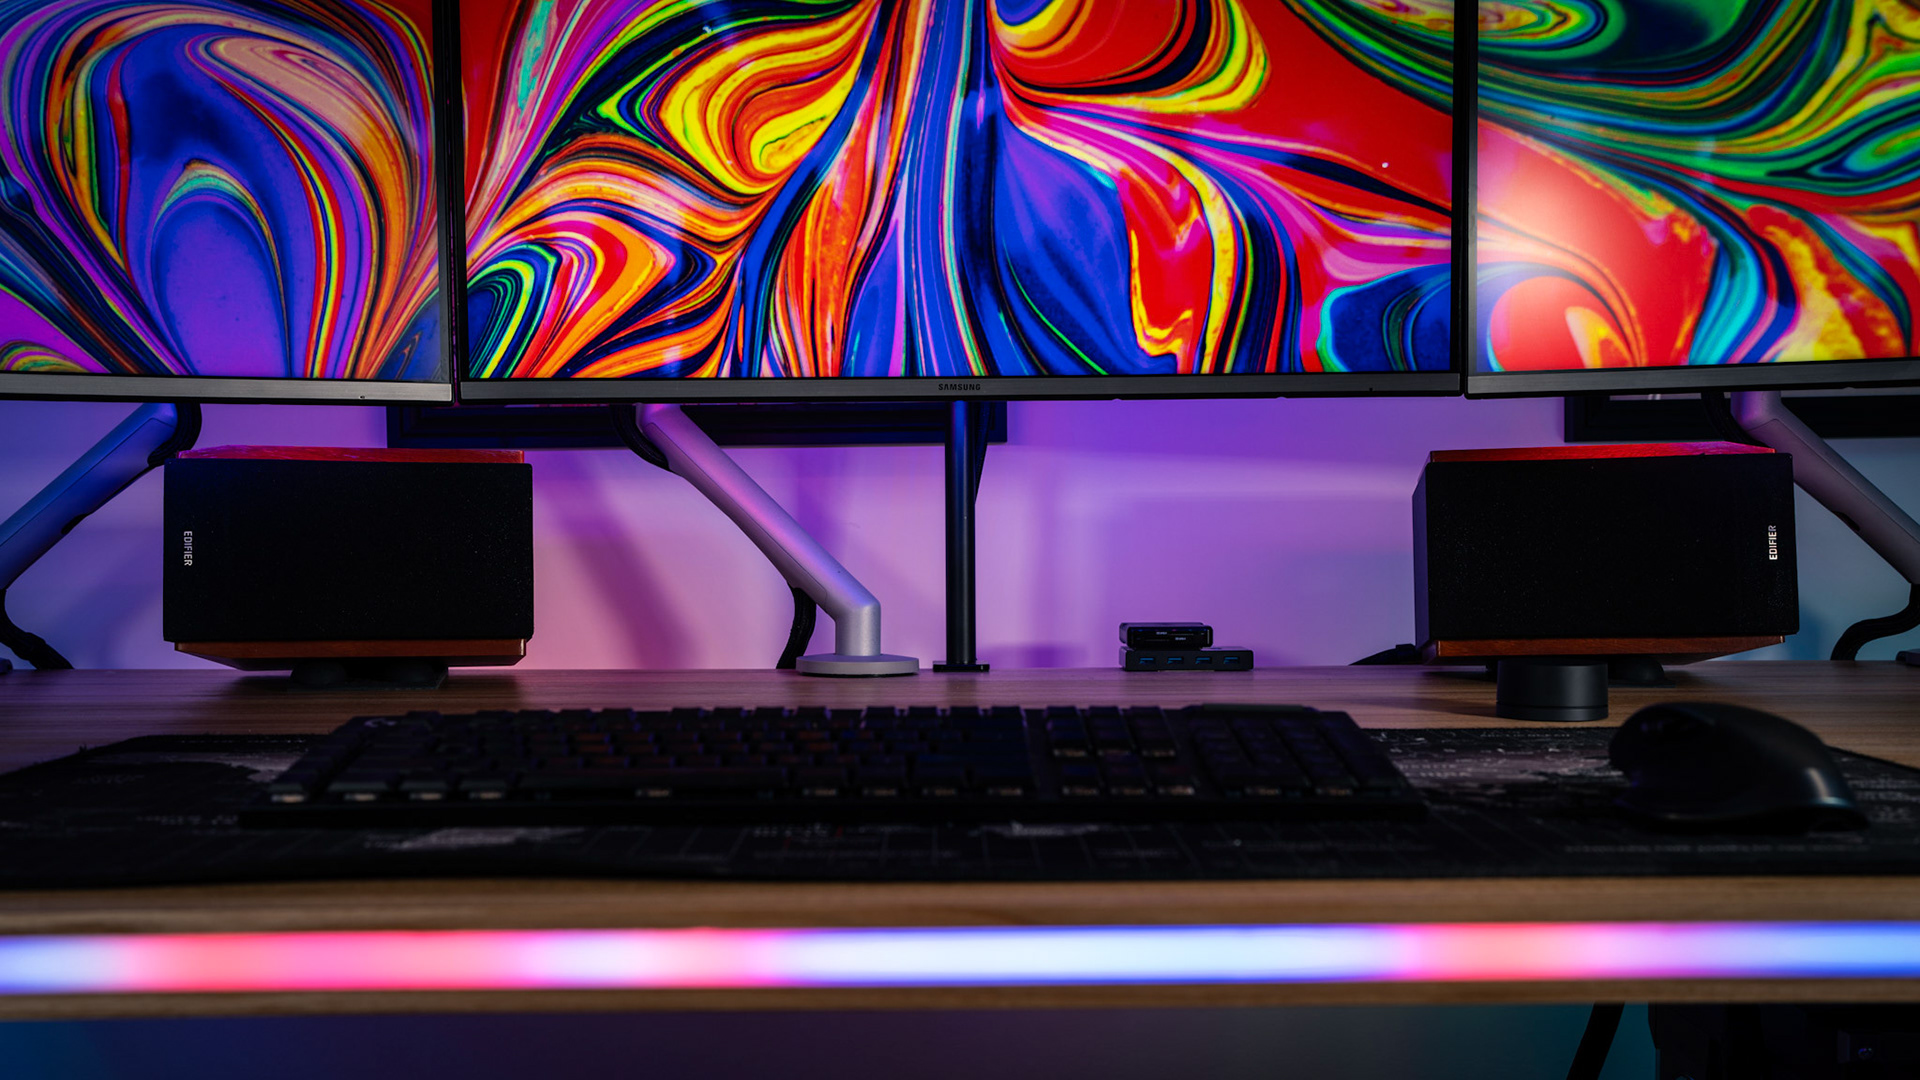
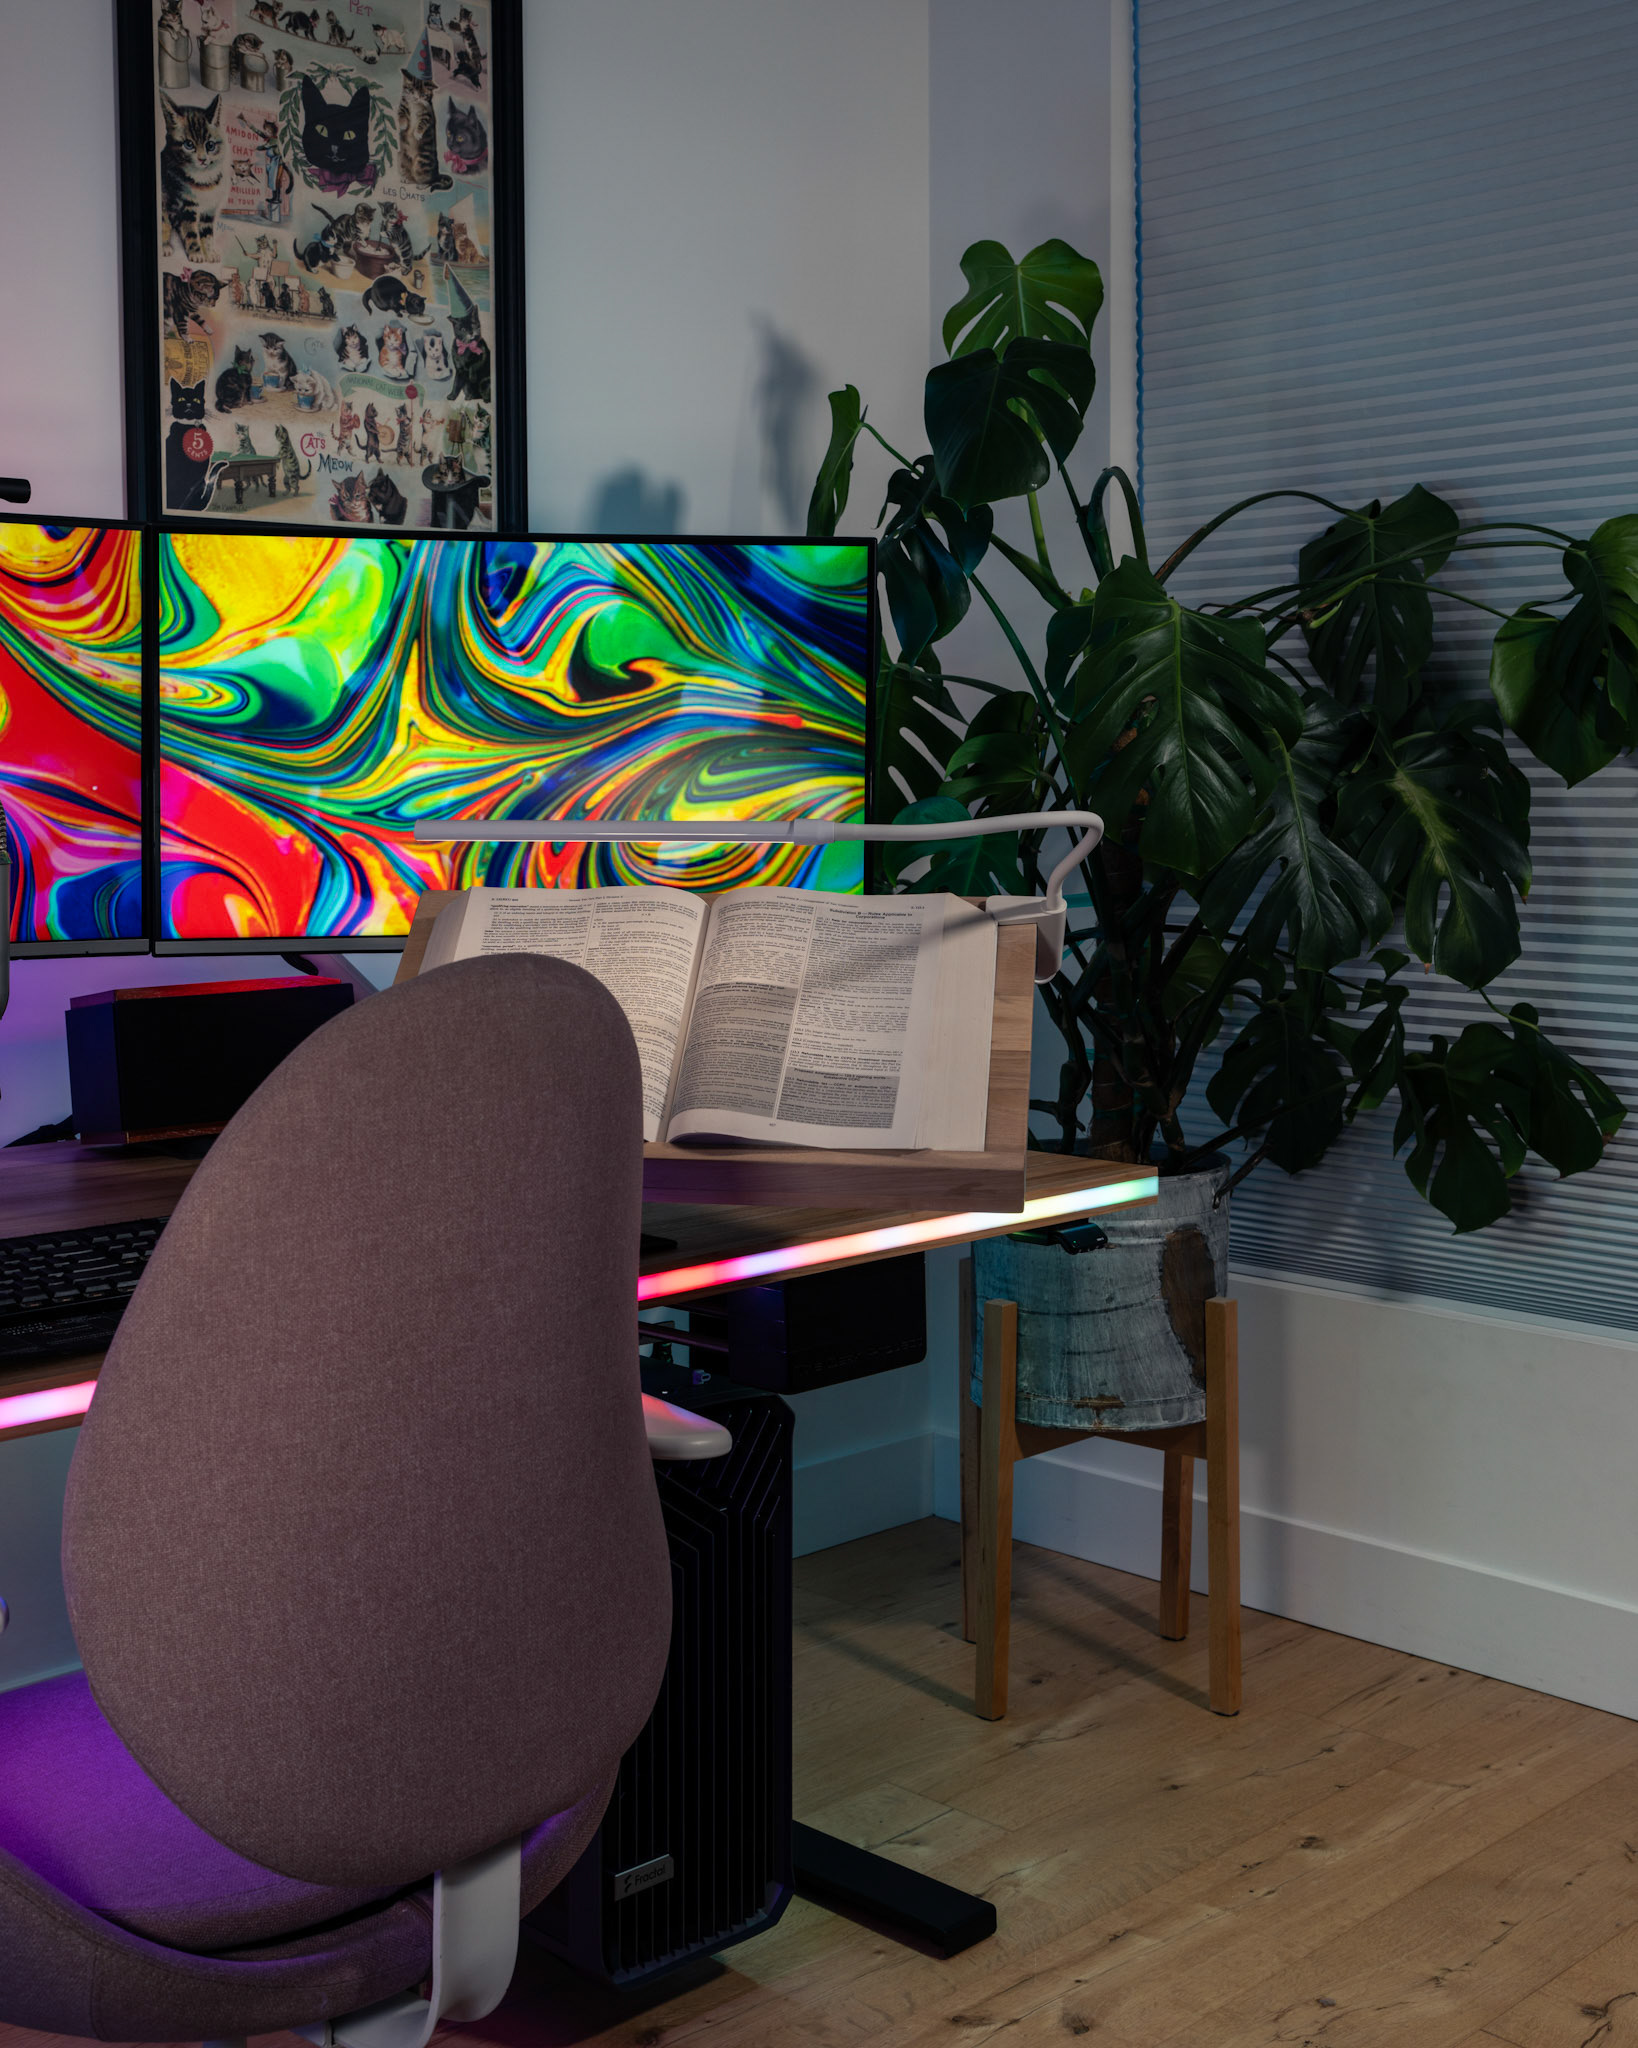
The LEDs on The Desk capture whatever is displaying on the computer monitors in real time, which ads a unique dimension to gaming, work, and media consumption. 

Overview
Here are the features that, to me, make The Desk exceptional:
Modularity: hundreds of under-desk mounting points, combined with a series of simple accessories, allows easy organization and installation of almost anything.
Work & Play: with the click of a single button, every peripheral can be instantly transferred between a work laptop and a personal PC.   
Ambiance: integrated addressable LEDs are bright, easily customizable, and can sync with whatever is on the monitors. 
Open Source: simple design rules means I (or anyone, really) can make new accessories for The Desk or install them in most other desks just by drilling a few holes. 
Longevity: a solid oak surface, quality legs, and the modular design means it will last a lifetime, even as my needs change.
Conception
I have a simple rule in life:
If it doesn’t have a place to go, it will never be put away.
While finding a place is easy for some things (e.g., for books, use a book shelf), it is harder on a work station. Cables, computers, peripherals, connection hardware and more don't come in standard sizes. Band-aid organization solutions may make things look acceptable, but rarely last and often just cover up the underlying issue. Moreover, chaos, even if well-hidden, is always present in the back of your mind, and rears its ugly head whenever you need to change things around. I wanted an enjoyable and organizable work station. Thus, The Desk Project was born. 
Design
Requirements
There were three basic requirements for The Desk:
     Number 1: Sit-to-stand. 
     Number 2: Aesthetic and lasts a lifetime. 
     Number 3: Easy to organize.  
I also sought out to design something scalable: maybe The Desk Project could be shared with more people than just me. 
The Basics
I chose solid oak for the desktop: it’s durable, sustainable, beautiful, and can easily be made in almost any size big or small. I went with 82” wide (208cm), 38” deep (97cm),  and 1.5" thick (4cm) for The Desk. For my use case, these dimensions provided the room I needed so I could push the desk against the wall and still have my three monitors far enough away to be comfortable.
For the legs I found a manufacturer who had a high-quality system that could be easily adapted to fit most sizes of desks. Thus, design goals #1 and #2 were quickly solved.
Make it Organizable
For design goal #3 I ended up designing a grid-system of 1/8” holes, spaced across the entire underside with two rules:
     Number 1: any hole is exactly 2" from any other hole.
     Number 2: any hole is exactly 2" from the edge of the desk (if applicable). 
I then designed a series of accessories that could be attached to this system:
     • A “bungee cord” holder that enables quickly “bungeeing” things (e.g. cables, USB hubs, etc.) to the underside of The Desk;
     • A “webbing” holder that allows “strapping” of heavier items (e.g., docks, power strips, etc.) in a more permanent fashion than bungee mounts;
     • Flanged rods that, when paired, can be used to reasonably easily manage excess cable slack;
     • A custom-designed under-desk PC mount that swivels 180 degrees and slides front-and-back, so it can be moved away from kicking legs, but allowing easy access to ports;
     • A headphone holder; and
     • A laptop and keyboard holder.
While not a design requirement, I thought integrated lighting would be fun, so I also included cut-outs for both edge and underside desk lighting. I also designed a spot to hide a wireless charger.
I hopped into CAD and got to work: ​​​​​​​
Construction
I’m a hobbyist woodworker but due to the size of The Desk I had a local shop glue-up the wood for me. They had some scrap oak laying around so we used that. They also had a CNC machine, so I provided them the necessary files and they drilled all my holes and cut the mounts for the underside LED lights. I finished the wood in a Poly-X - a durable finish that can be easily repaired in the future. I'm thoroughly impressed with the product: I've had multiple spills on The Desk, and even coffee drips that didn't get wiped away for days, and there's been absolutely no staining whatsoever. 
The edge-mounted lighting was more challenging. For this, I cut strips of diffuser material and planned to inlay it. I ended up having to use a router, a custom jig that I built, and a lot of patience to get the edges how I wanted but it all worked out (eventually). Indeed, getting tolerances tight for the flush aesthetic was a lot of work, but I eventually got it sorted. Fortunately, it would be easy to repeatedly make these cuts at scale - it was just more challenging with a one-off.  
All of the LED lights are mounted to aluminum that is raised from the wood to ensure good head dissipation for longevity. The edge-mounted LEDs are recessed about 1" from the diffuser material to ensure a very diffuse effect with no hotspots. The LEDs are connected to 5 separate ESP 32 boards, all of which is powered by a high-quality fan-less power supply that provides enough power for adding additional LEDs in the future. What I had not anticipated was the astronomical amount of wire needed to get these running - the next version will definitely hide this wiring. A huge shoutout to my brother who helped tremendously along the way. 
Once complete, I installed the legs. Badabing!
Installation
While there's certainly a few areas for improvement on the next version, I was still extremely pleased with how things ended up working out. Over the course of several hours I managed to get everything installed, including by routing and managing all the cables in a way that allowed my PC to completely benefit from its swivel mount without damaging it or its cables.

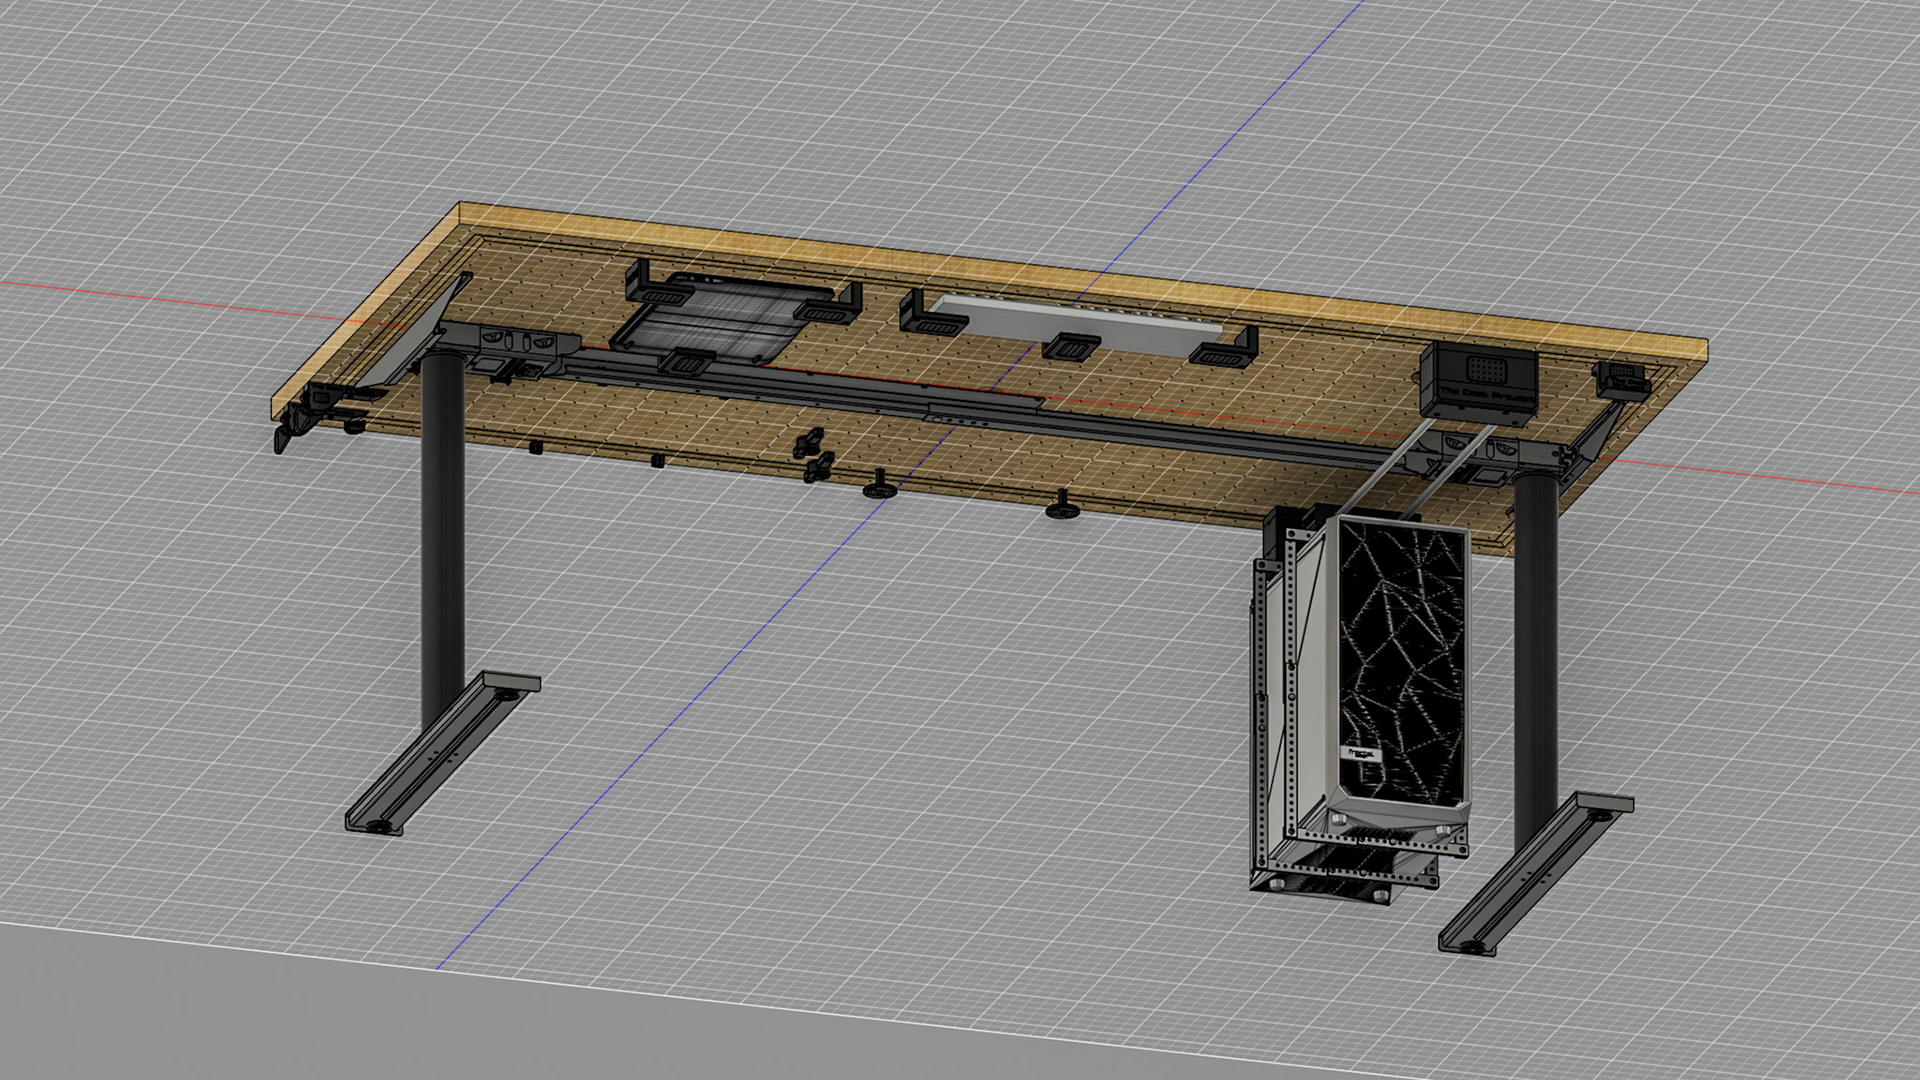
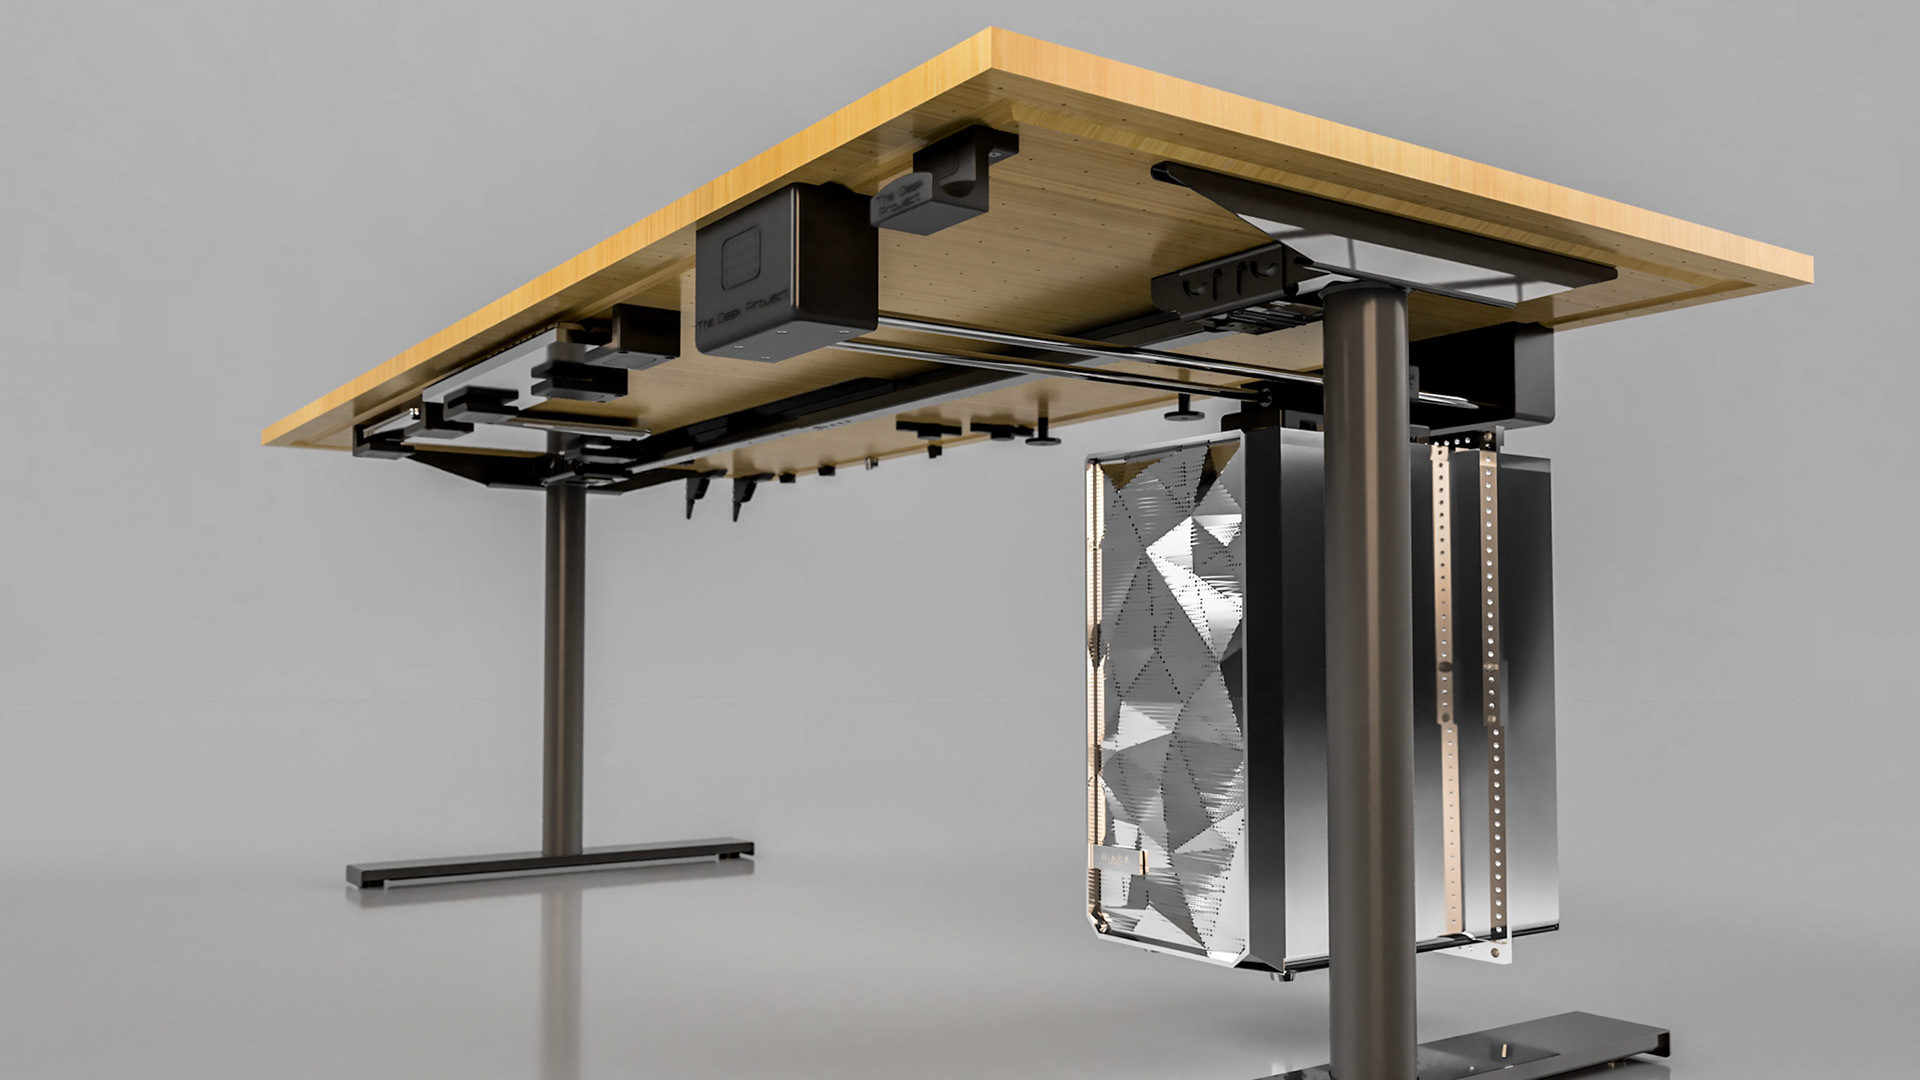
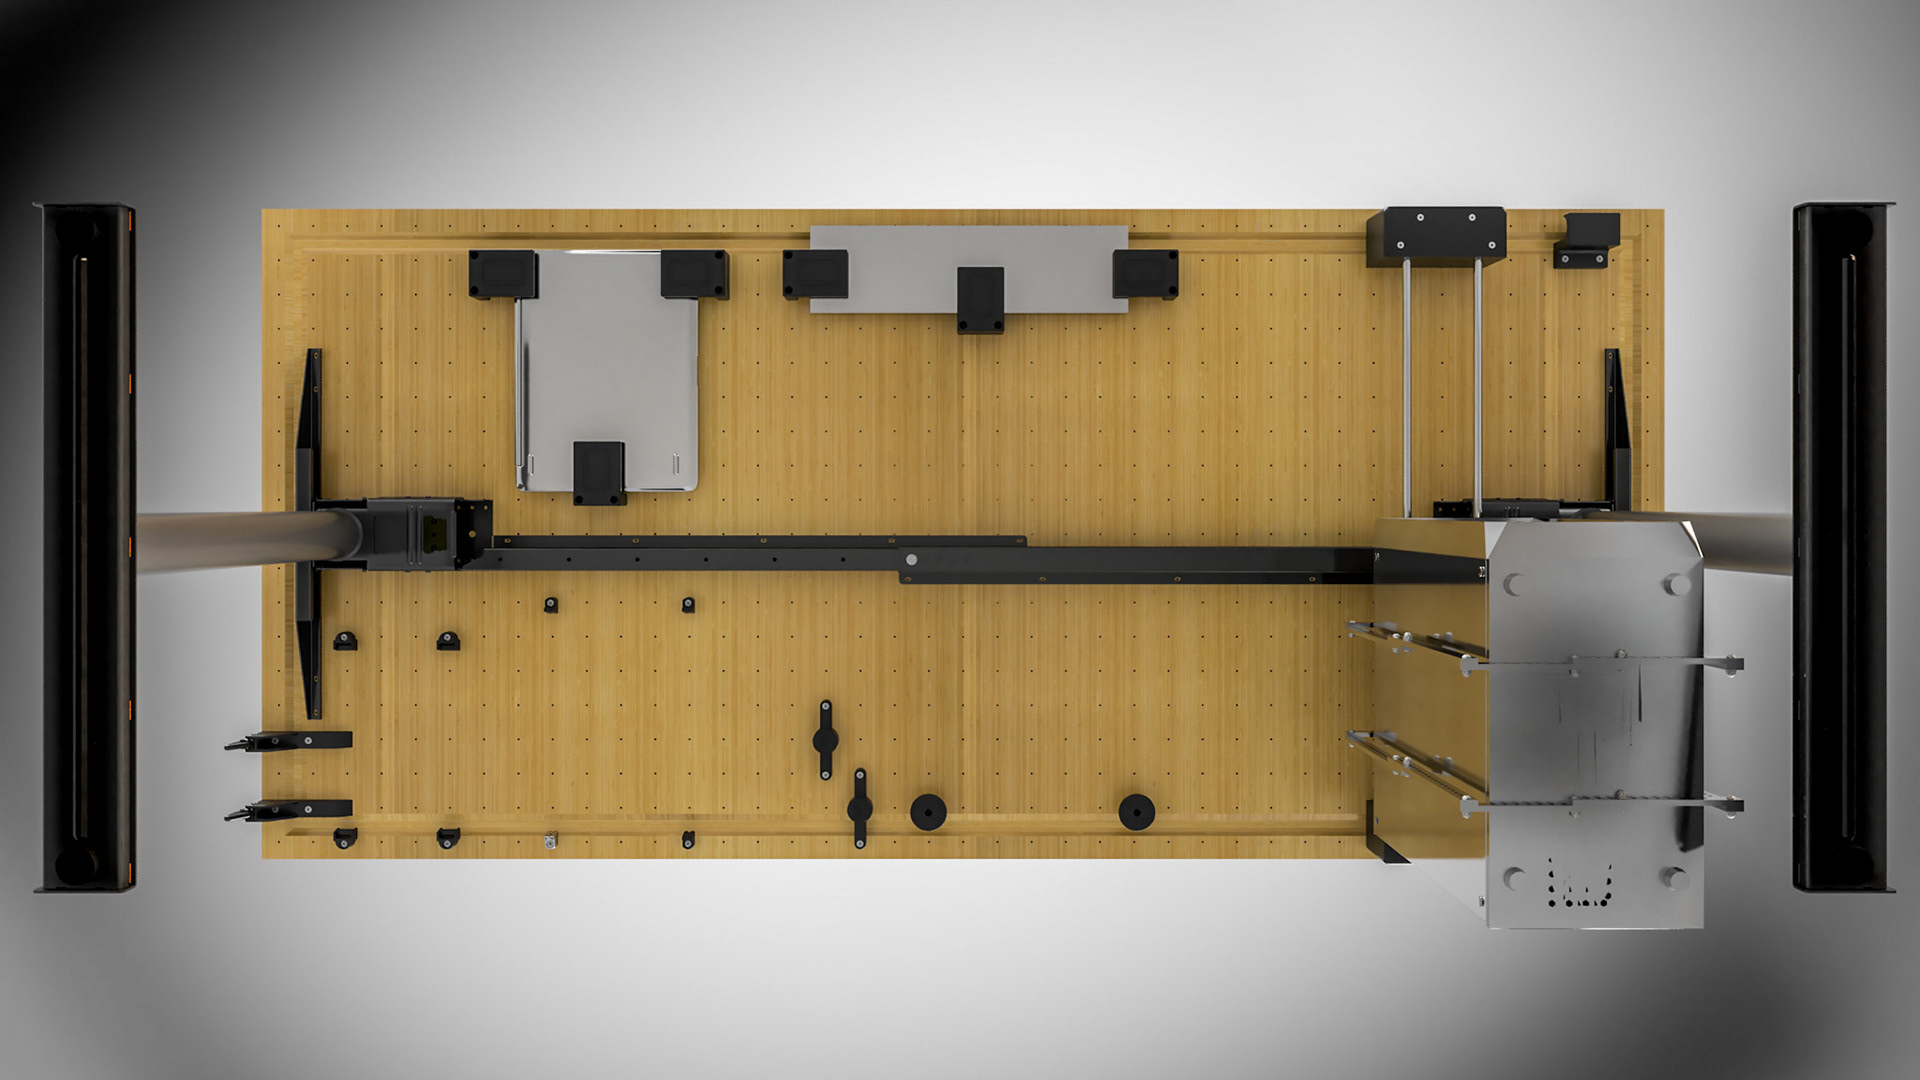
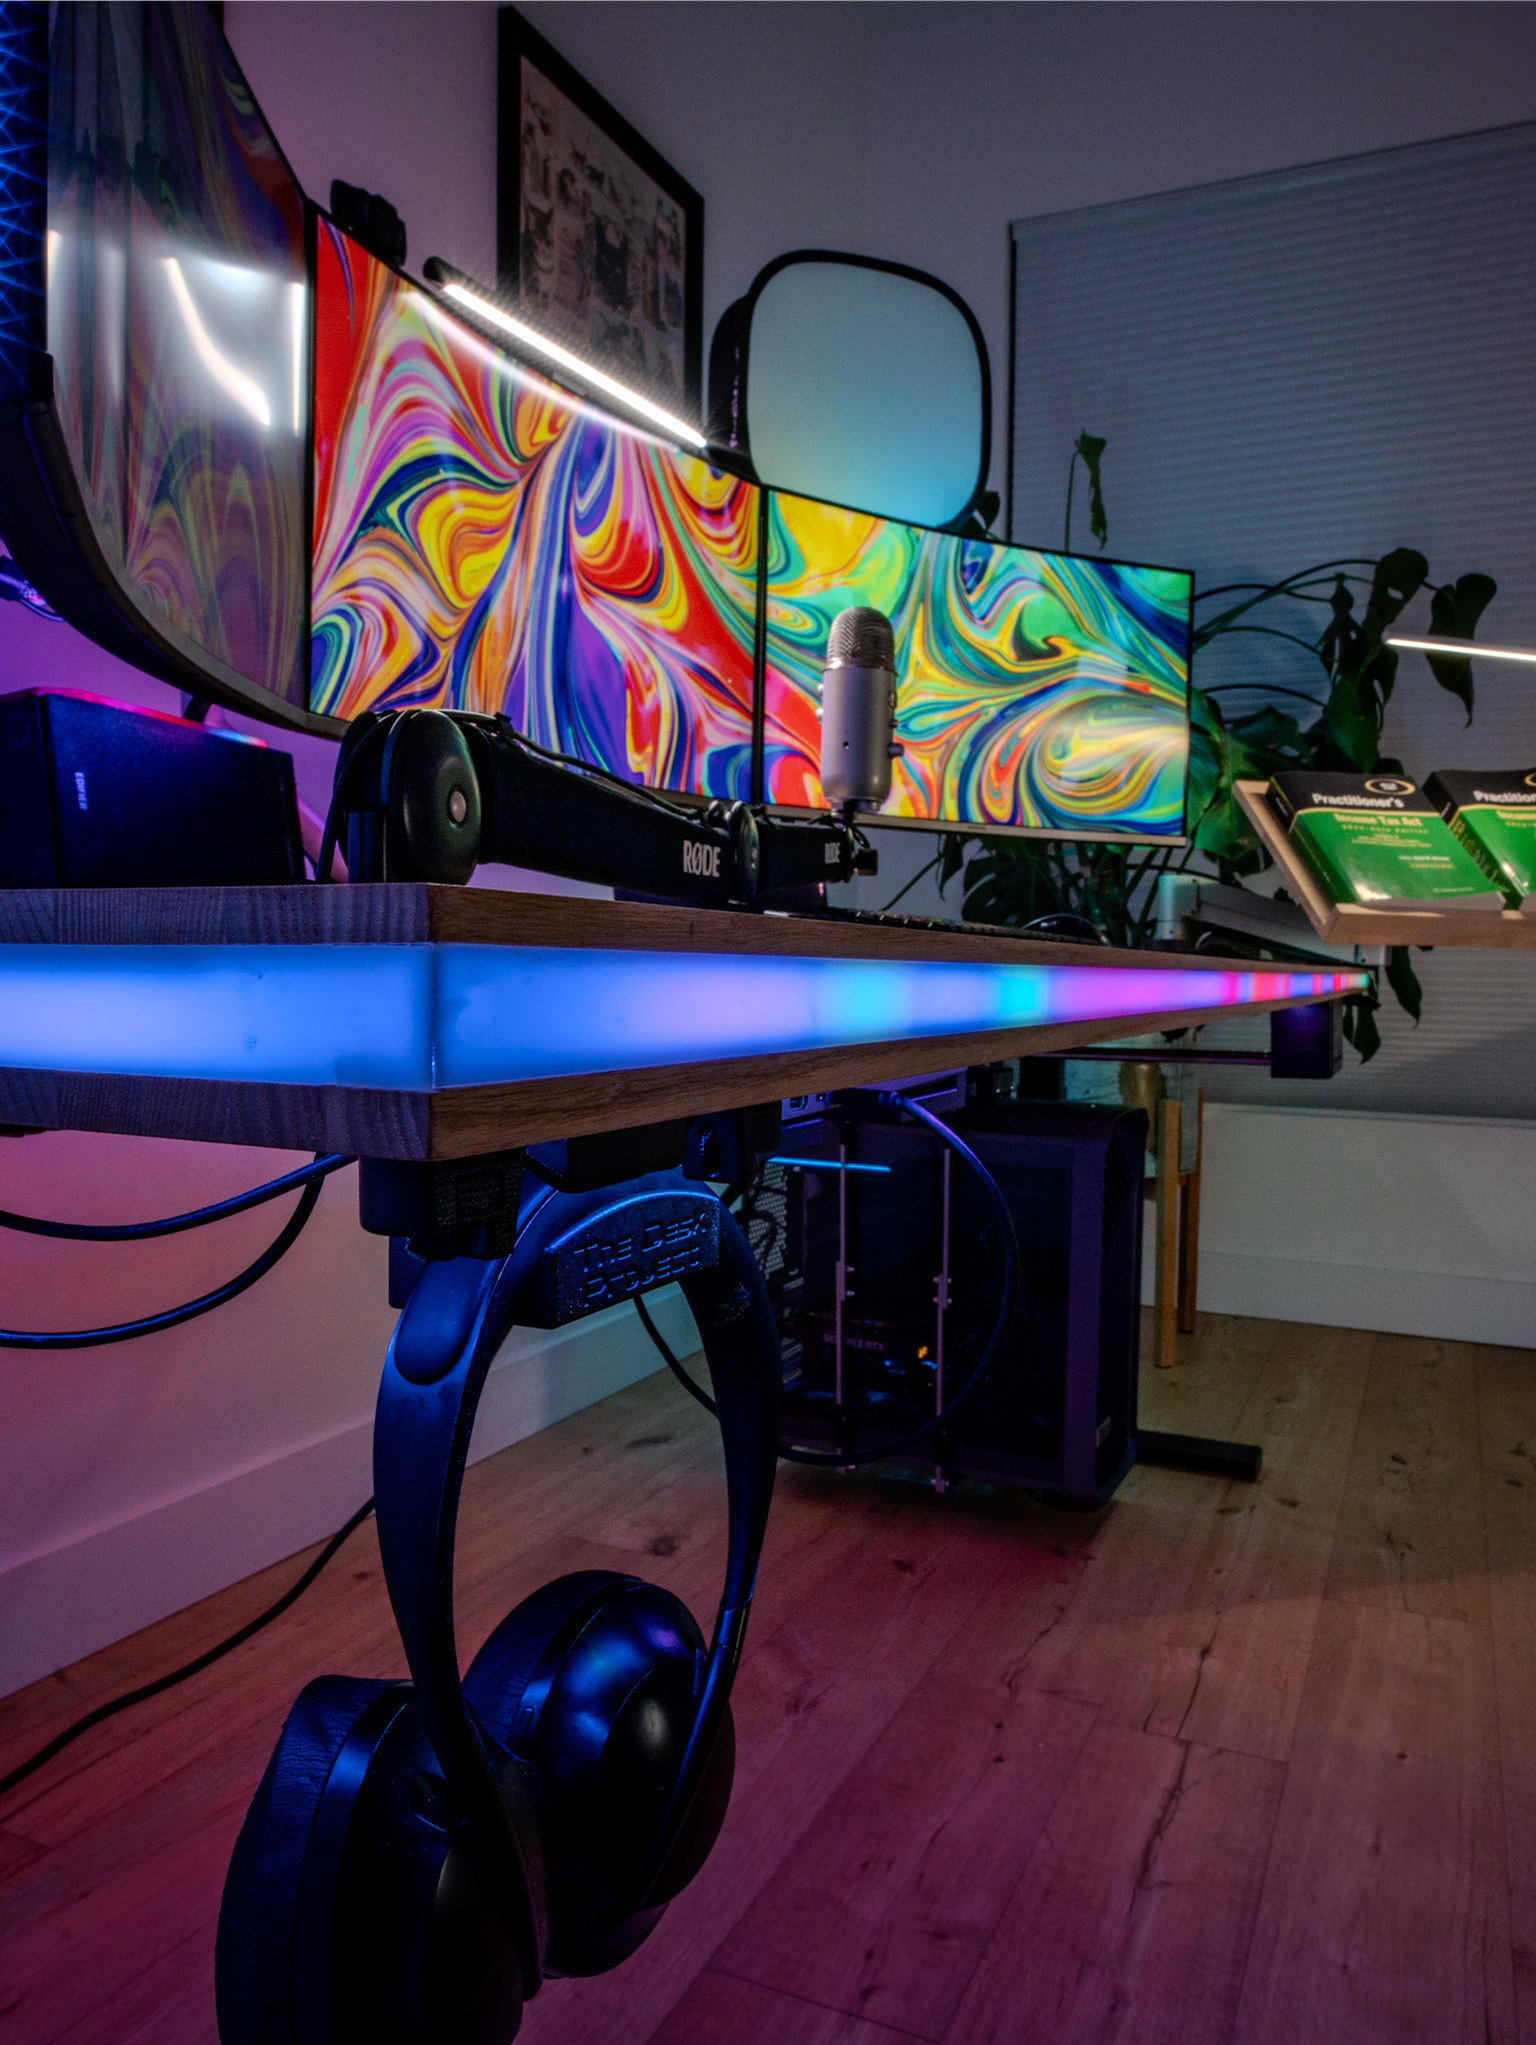
Of all the things, the PC swivel mount is perhaps one of the design items that turned out best. My PC is very large and very heavy, and I haven't had any issues so far. 

I also managed to install the plethora of hubs, power strips, docks, and switchers so that it all ended up looking decently organized. More importantly, though, it was done so that it's easy to add or remove things in the future if I need. In total, there are 40+ computing related cables alone, and once factoring in the cables for the LED lights and other items, I was easily approaching 100+ cables, but I'm not convinced you can tell just from looking at it. 

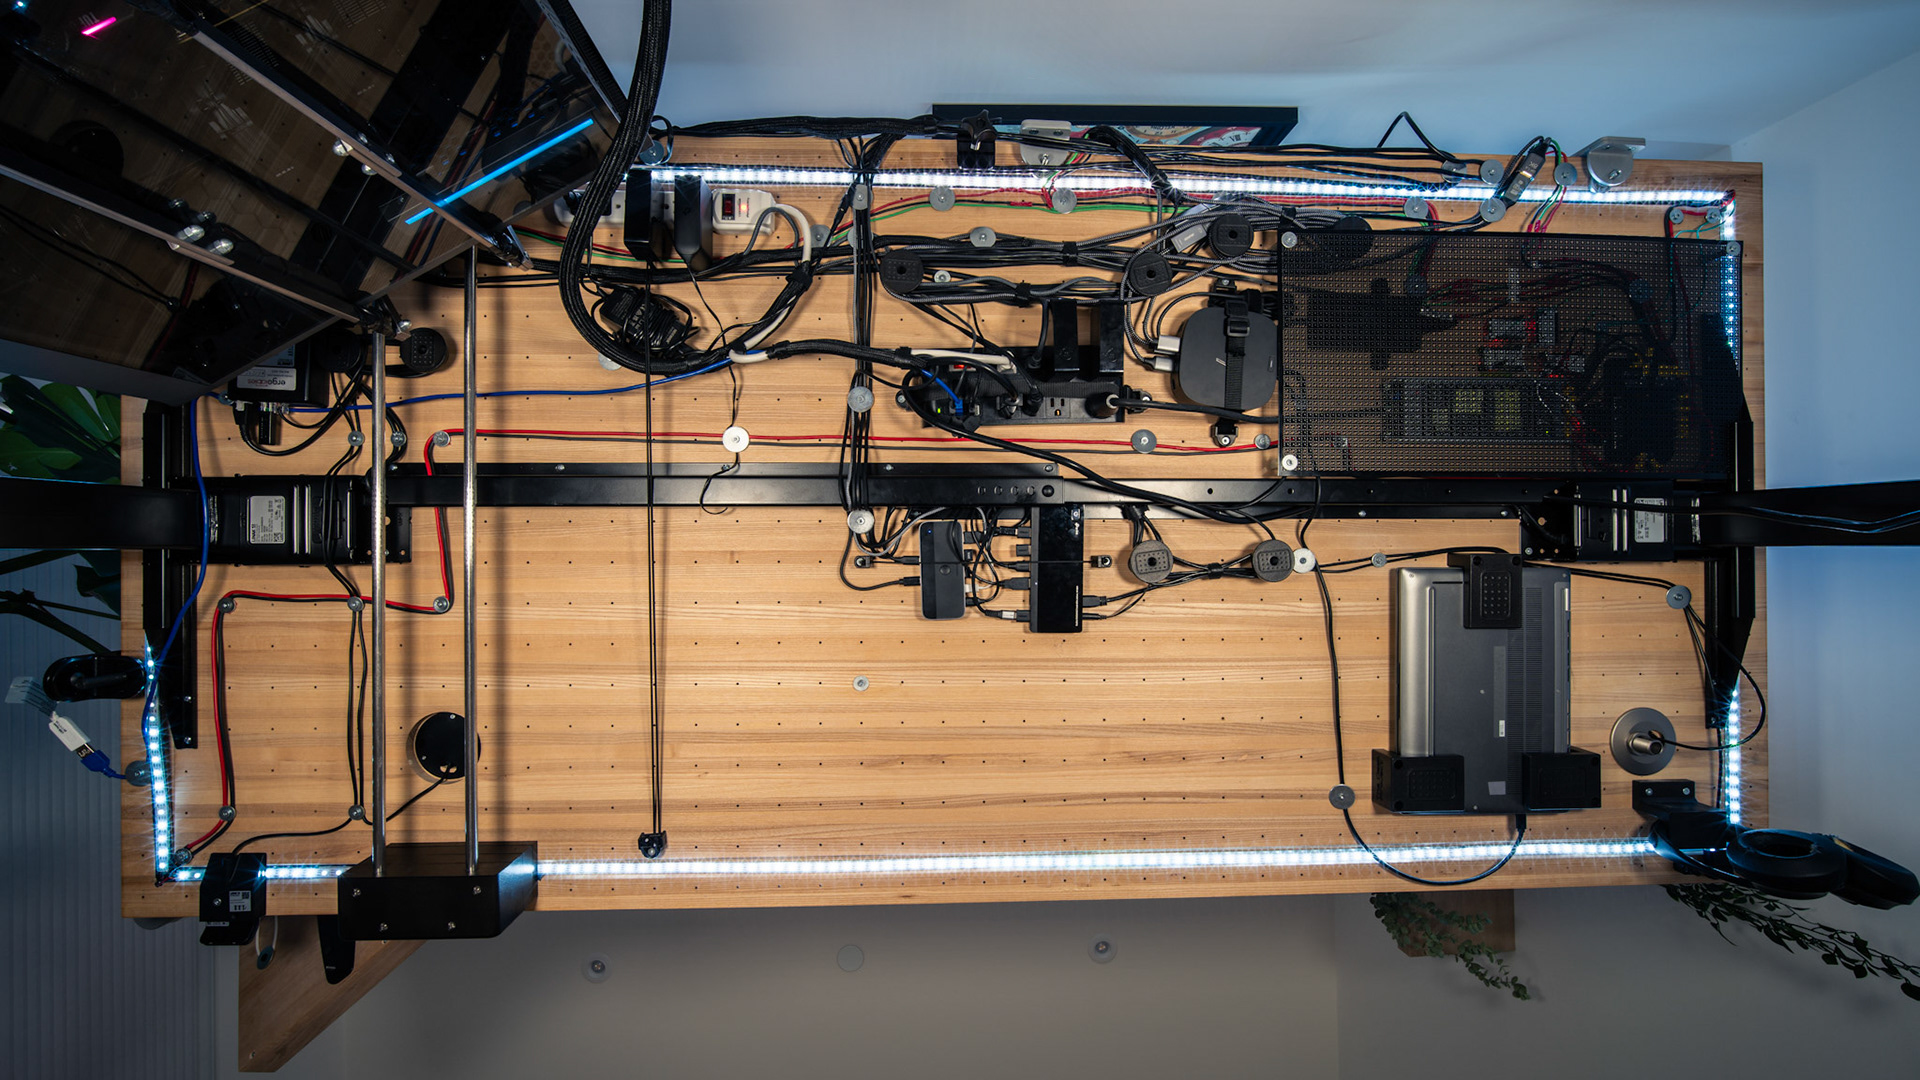
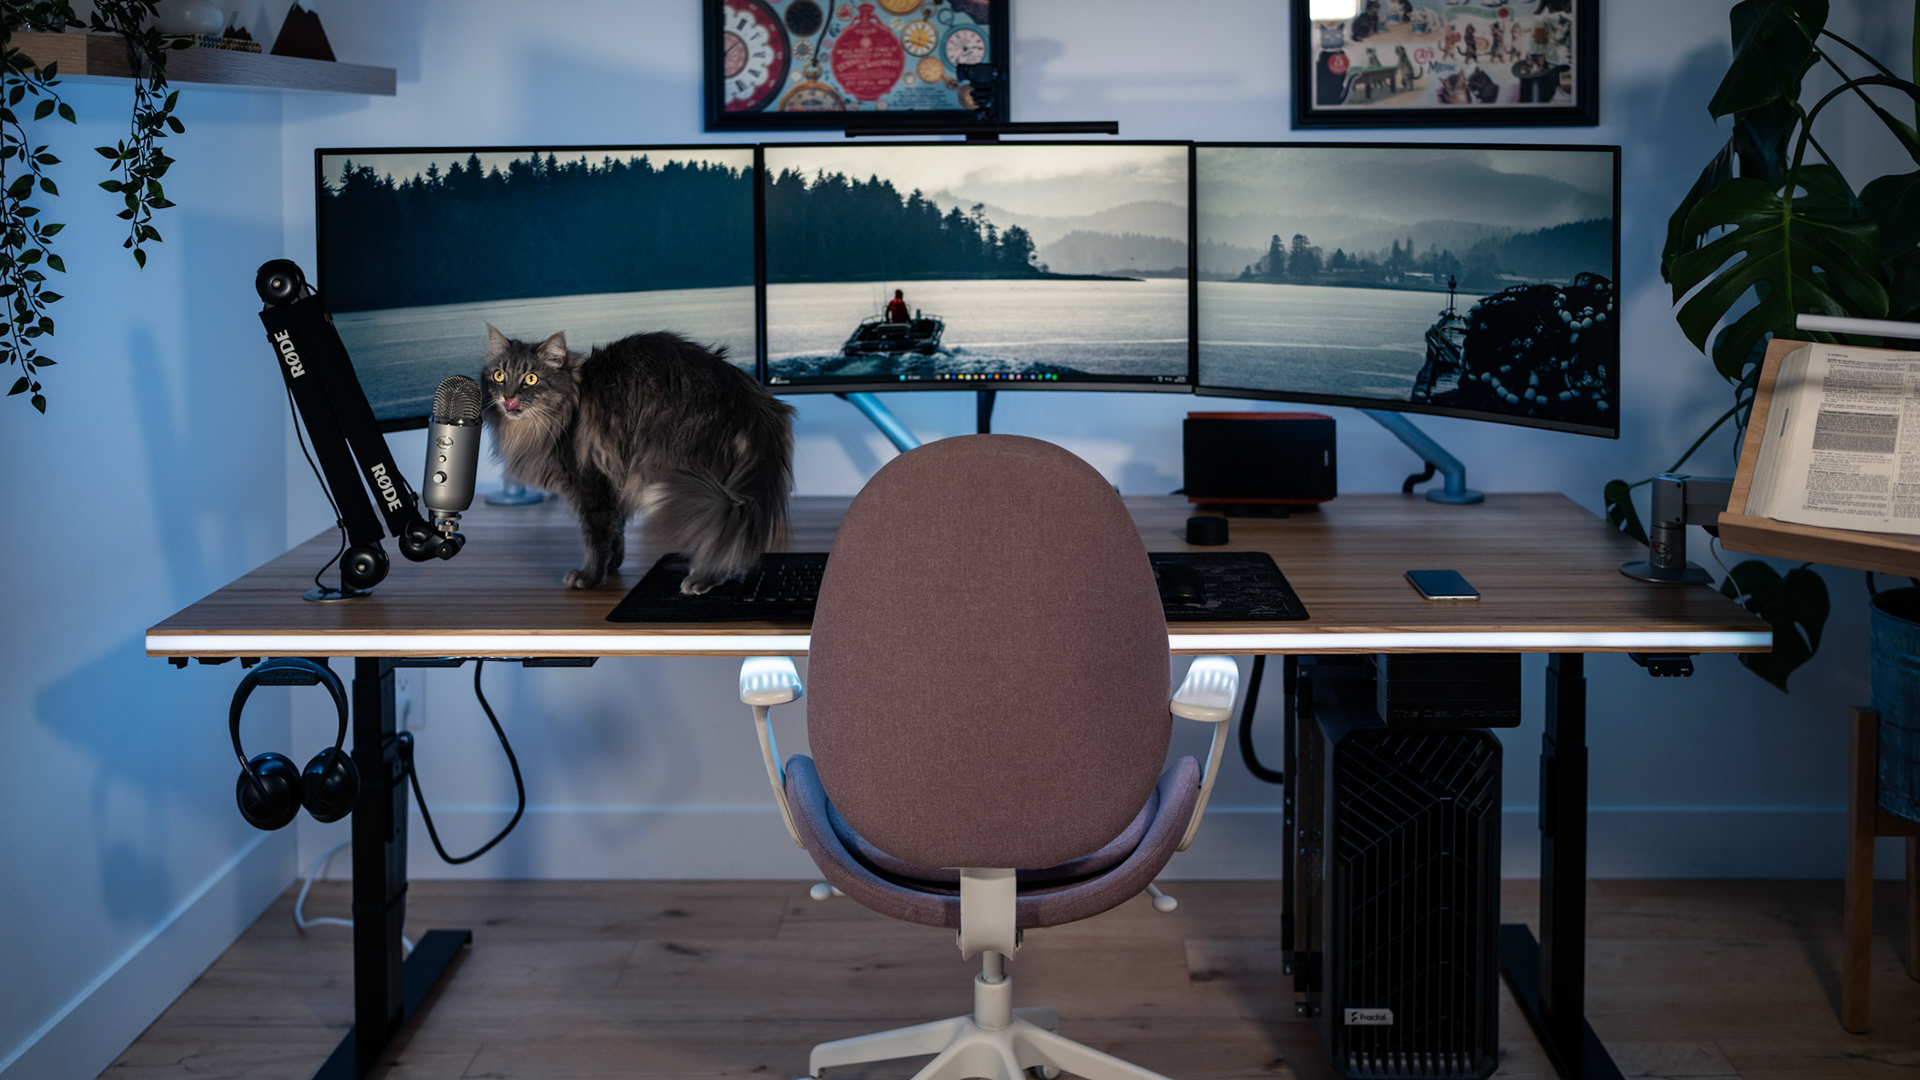
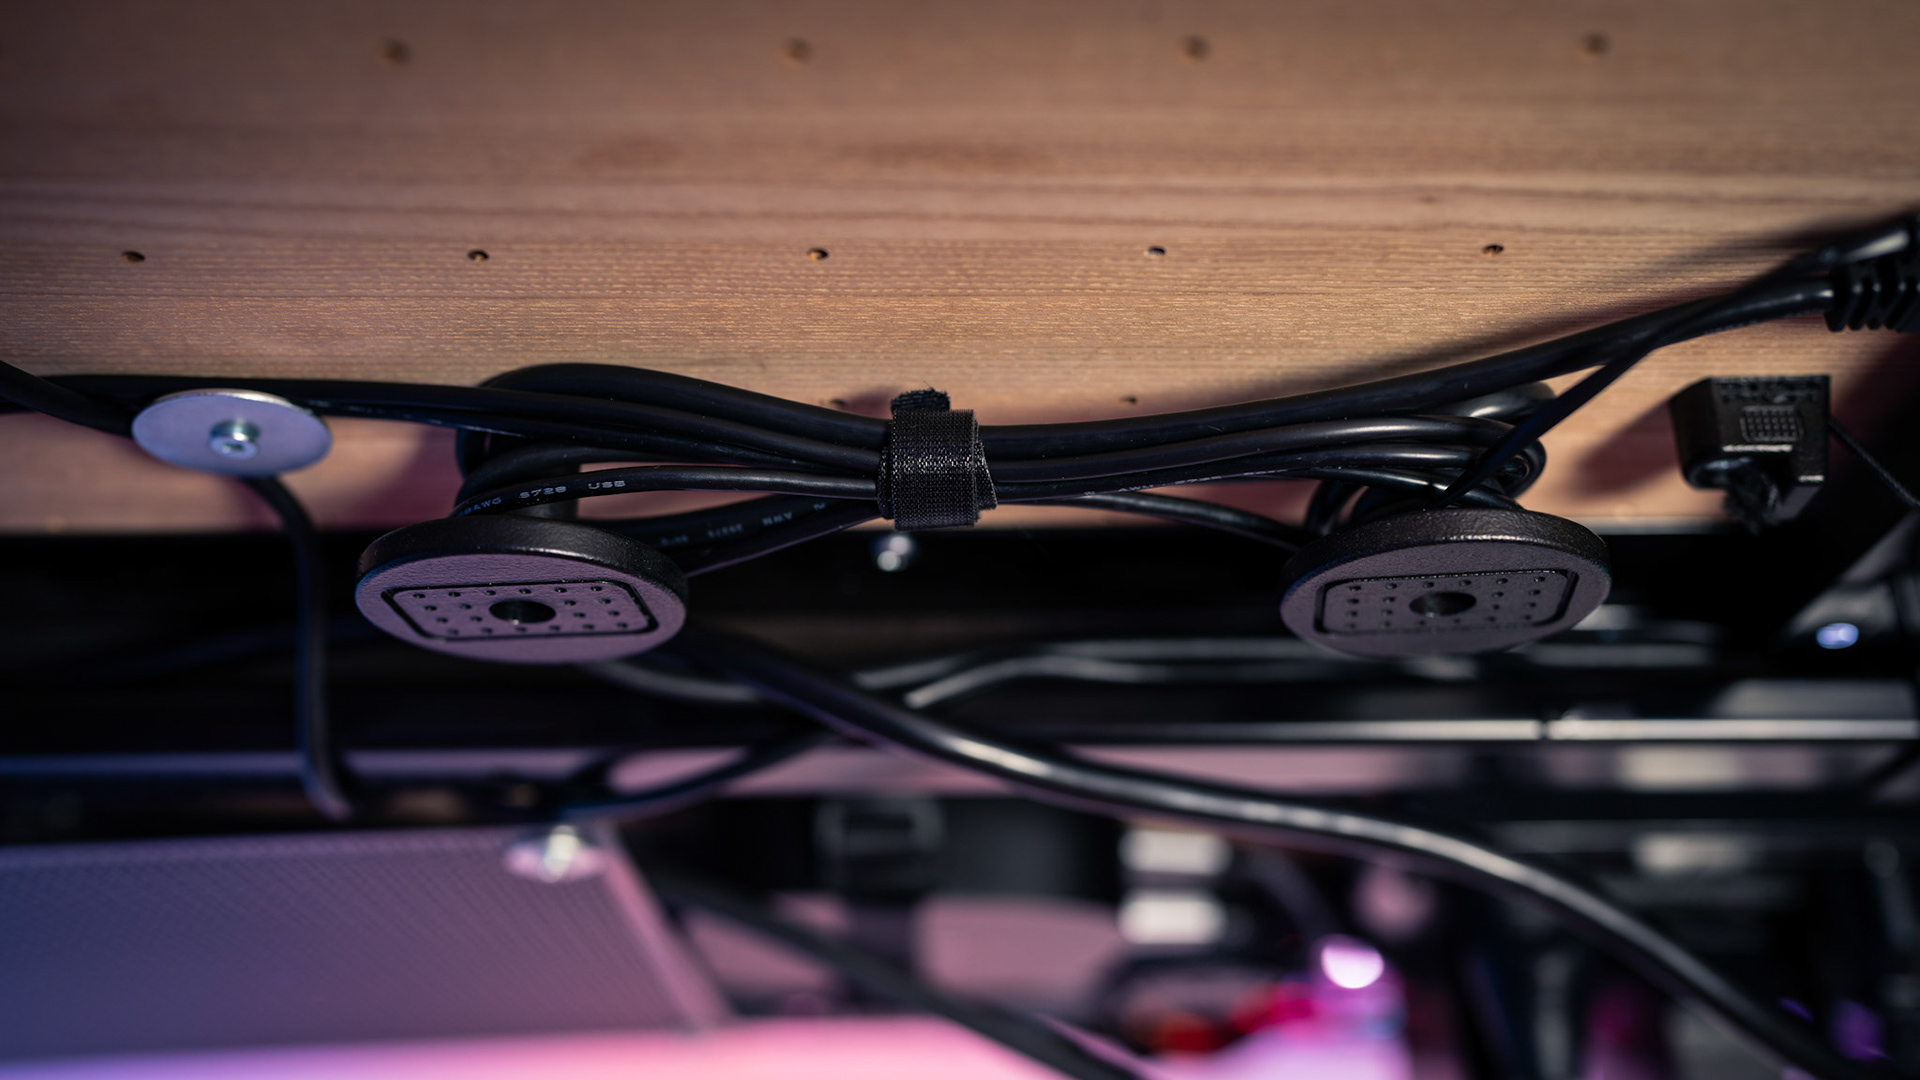
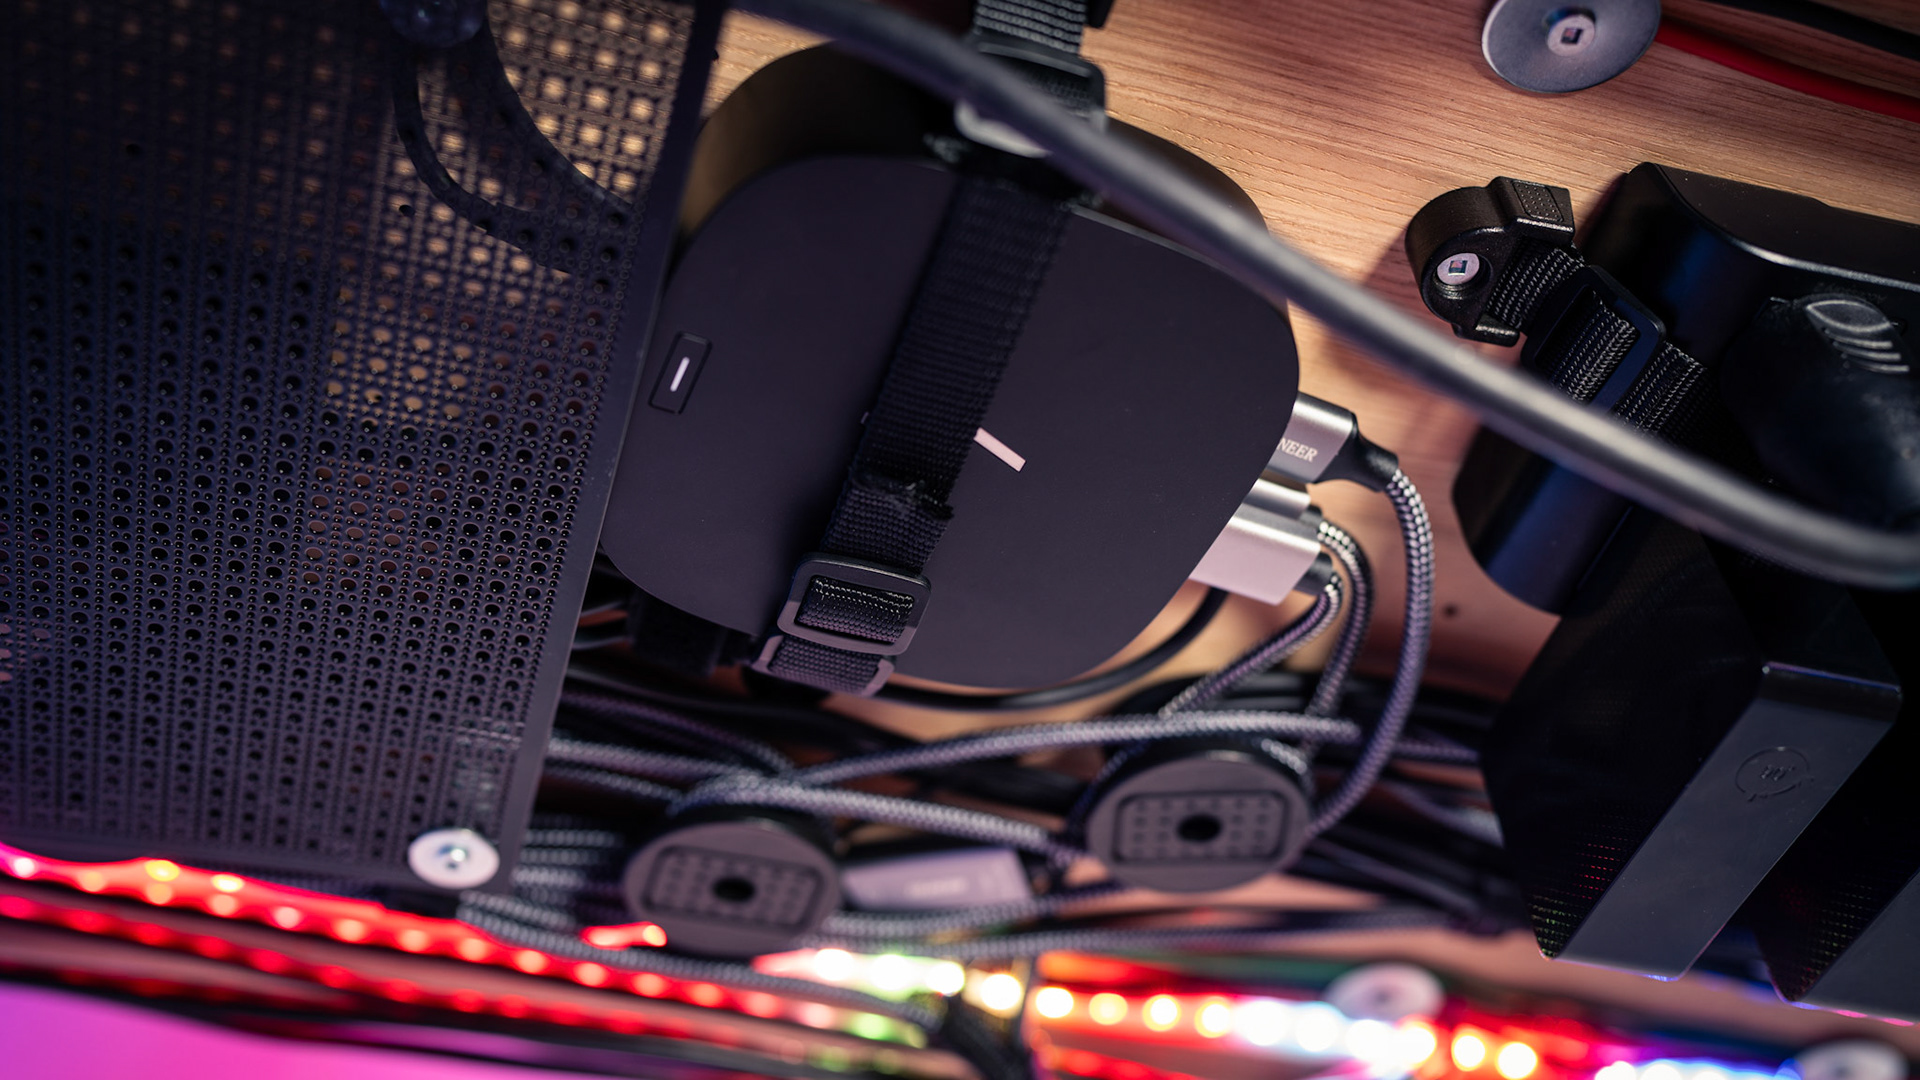
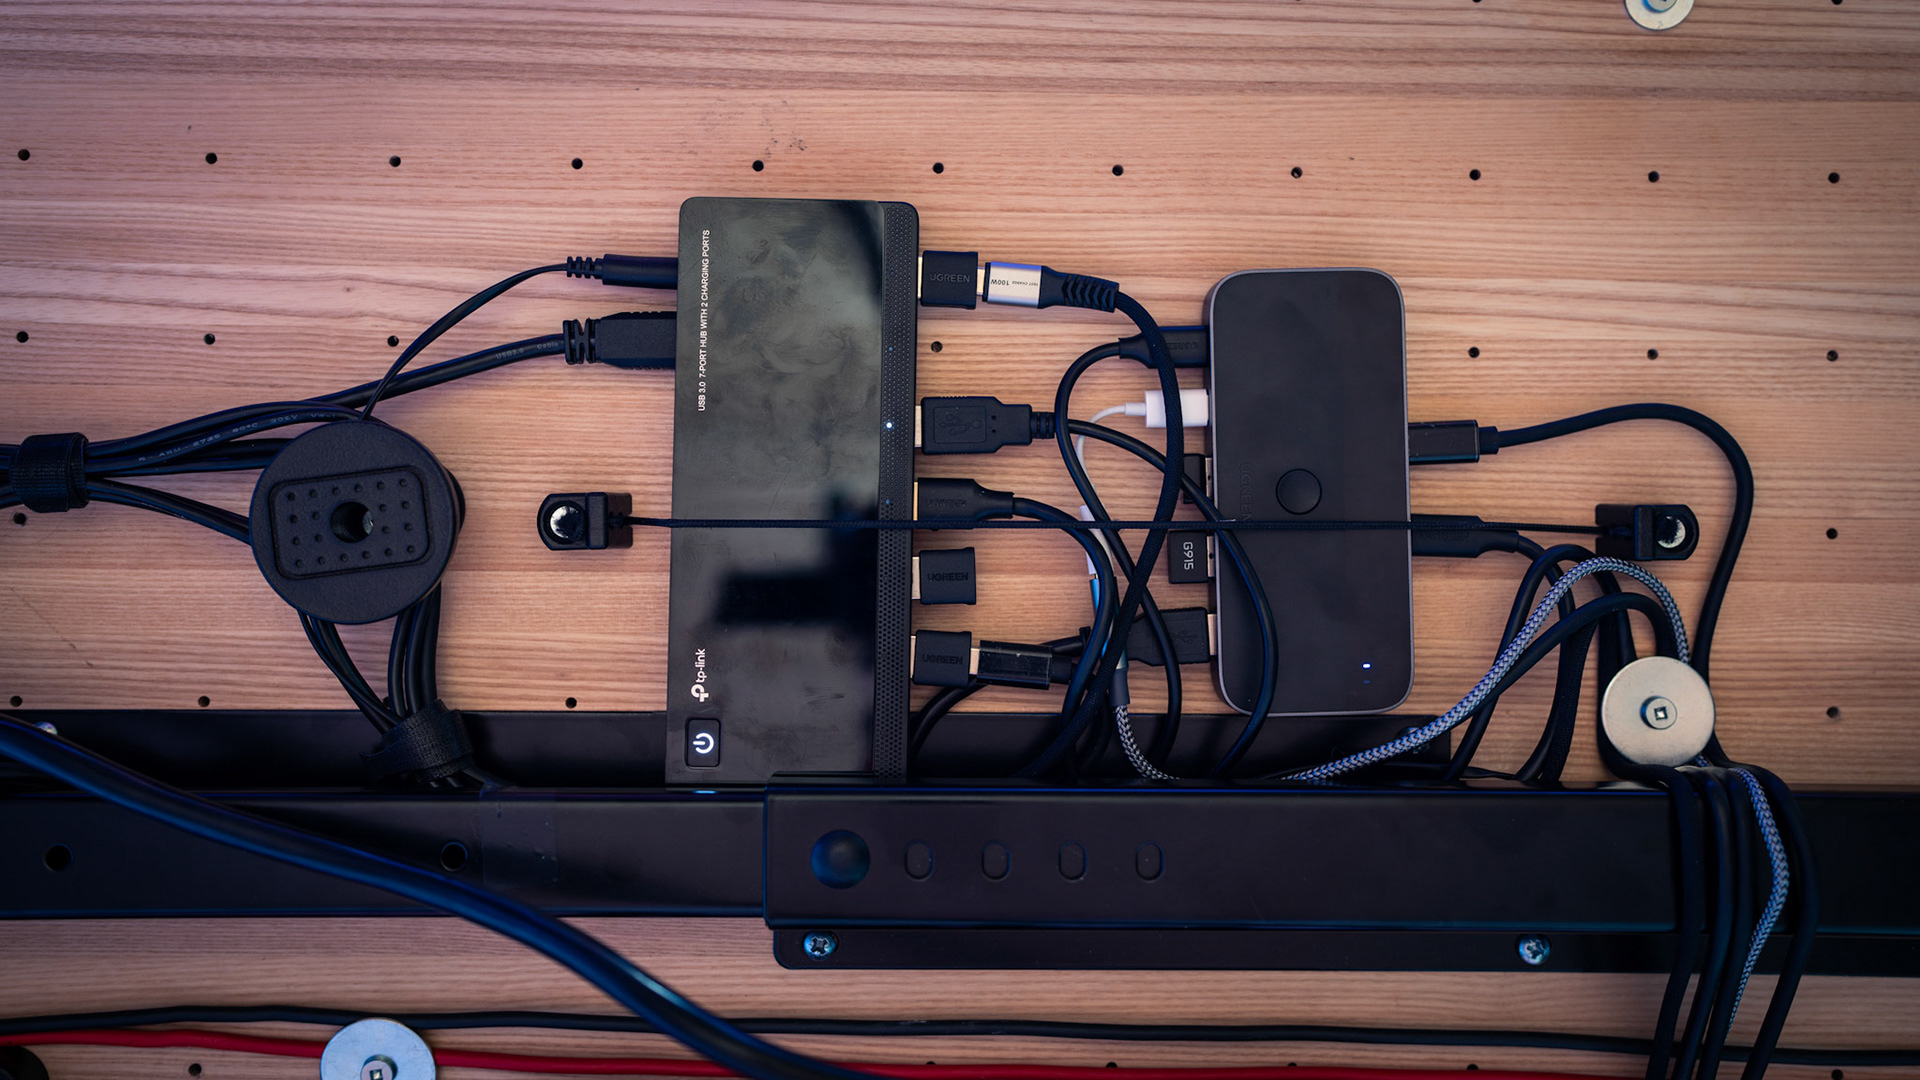
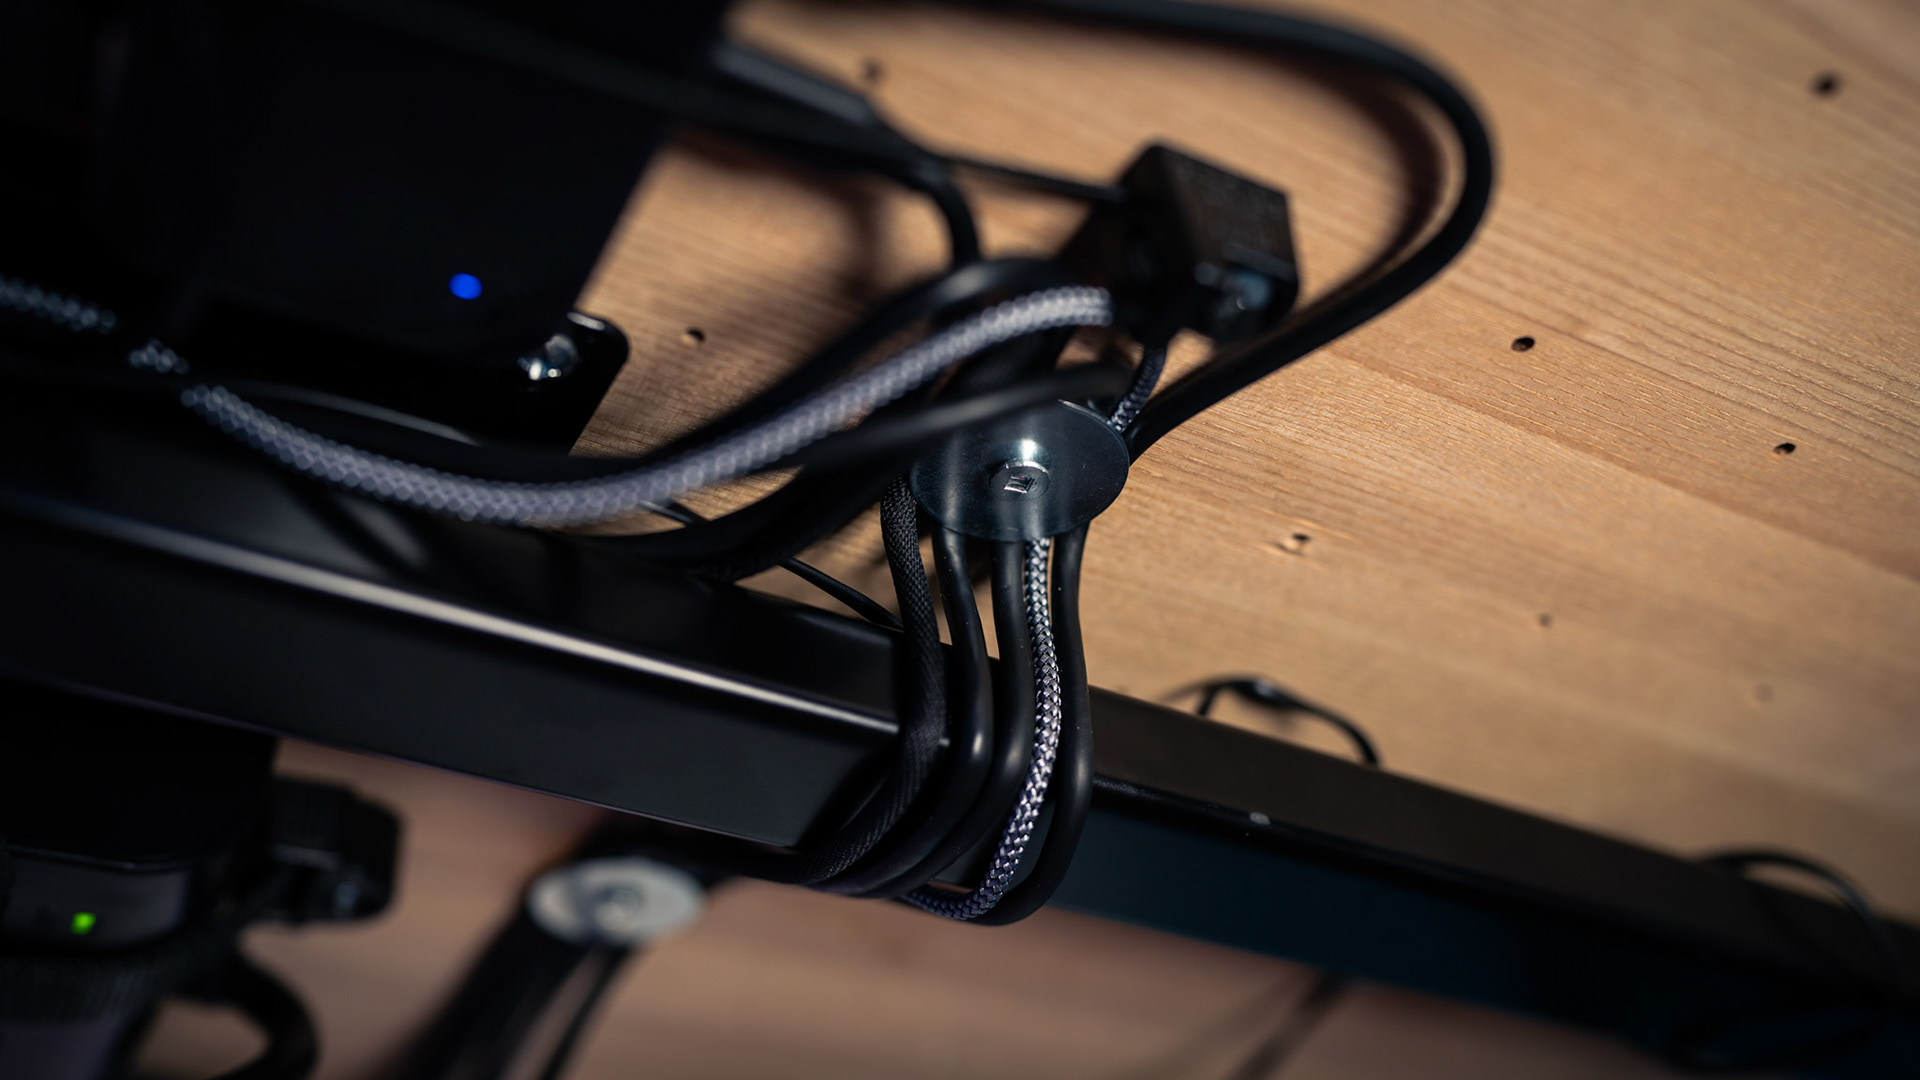
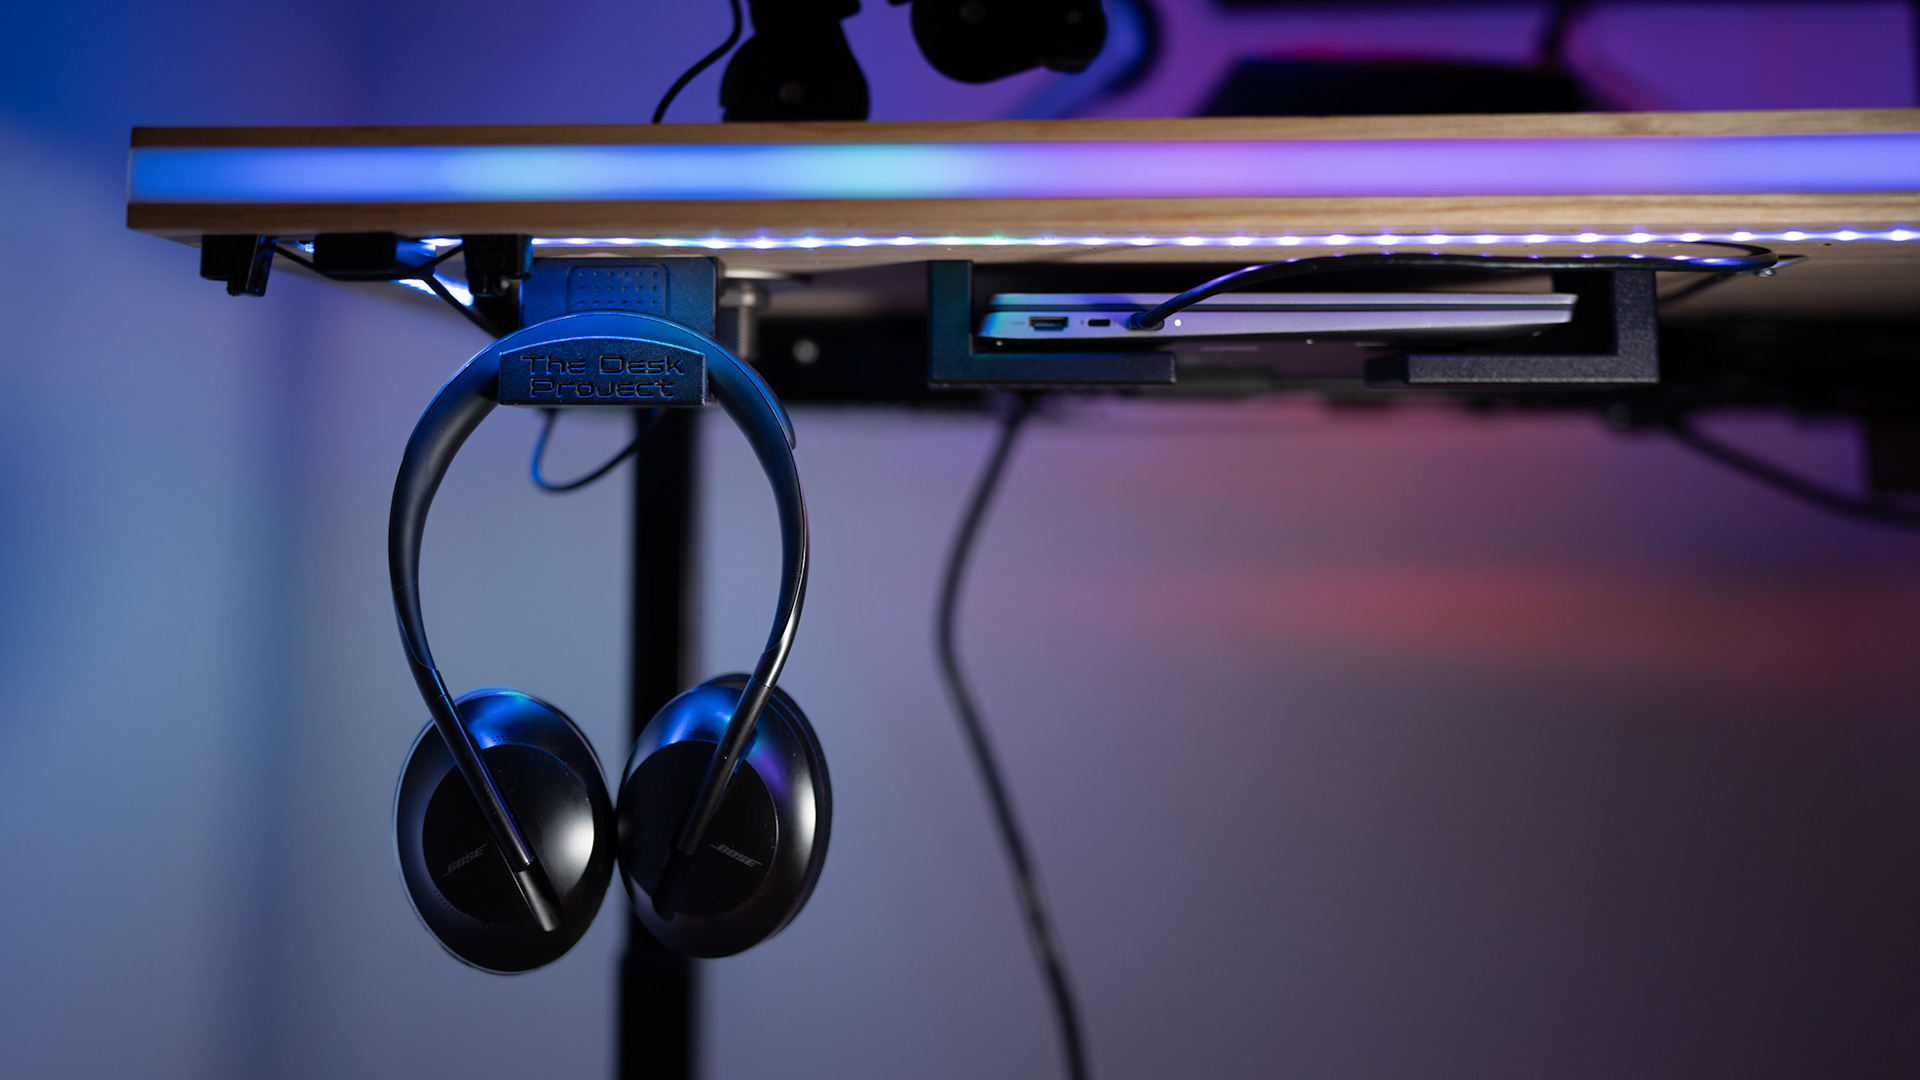
While there's certainly things I would improve regarding cable management in round two, I was pleased with how things worked out especially considering the sheer volume of cables in a desk like this. You can see the laptop is plugged in to a USB-C dock, which in turn has cables going to (i) the monitors; and (ii) the USB switcher to the left of the monitor. The PC routes similarly, with video cables to the monitors and USB-C to the switcher. The switcher has a remote by the headphones that when pushed transfers all peripherals between the laptop and PC. The only other thing to do is switch the source on each monitor. A KVM switch would work better, but I could not find any that supported triple 4k monitors and that met my other needs. 

With some additional love and time I managed to mount additional LED lights to the back of the monitors for additional ambiance, as well as to run all the cabling for them, plus the speakers.

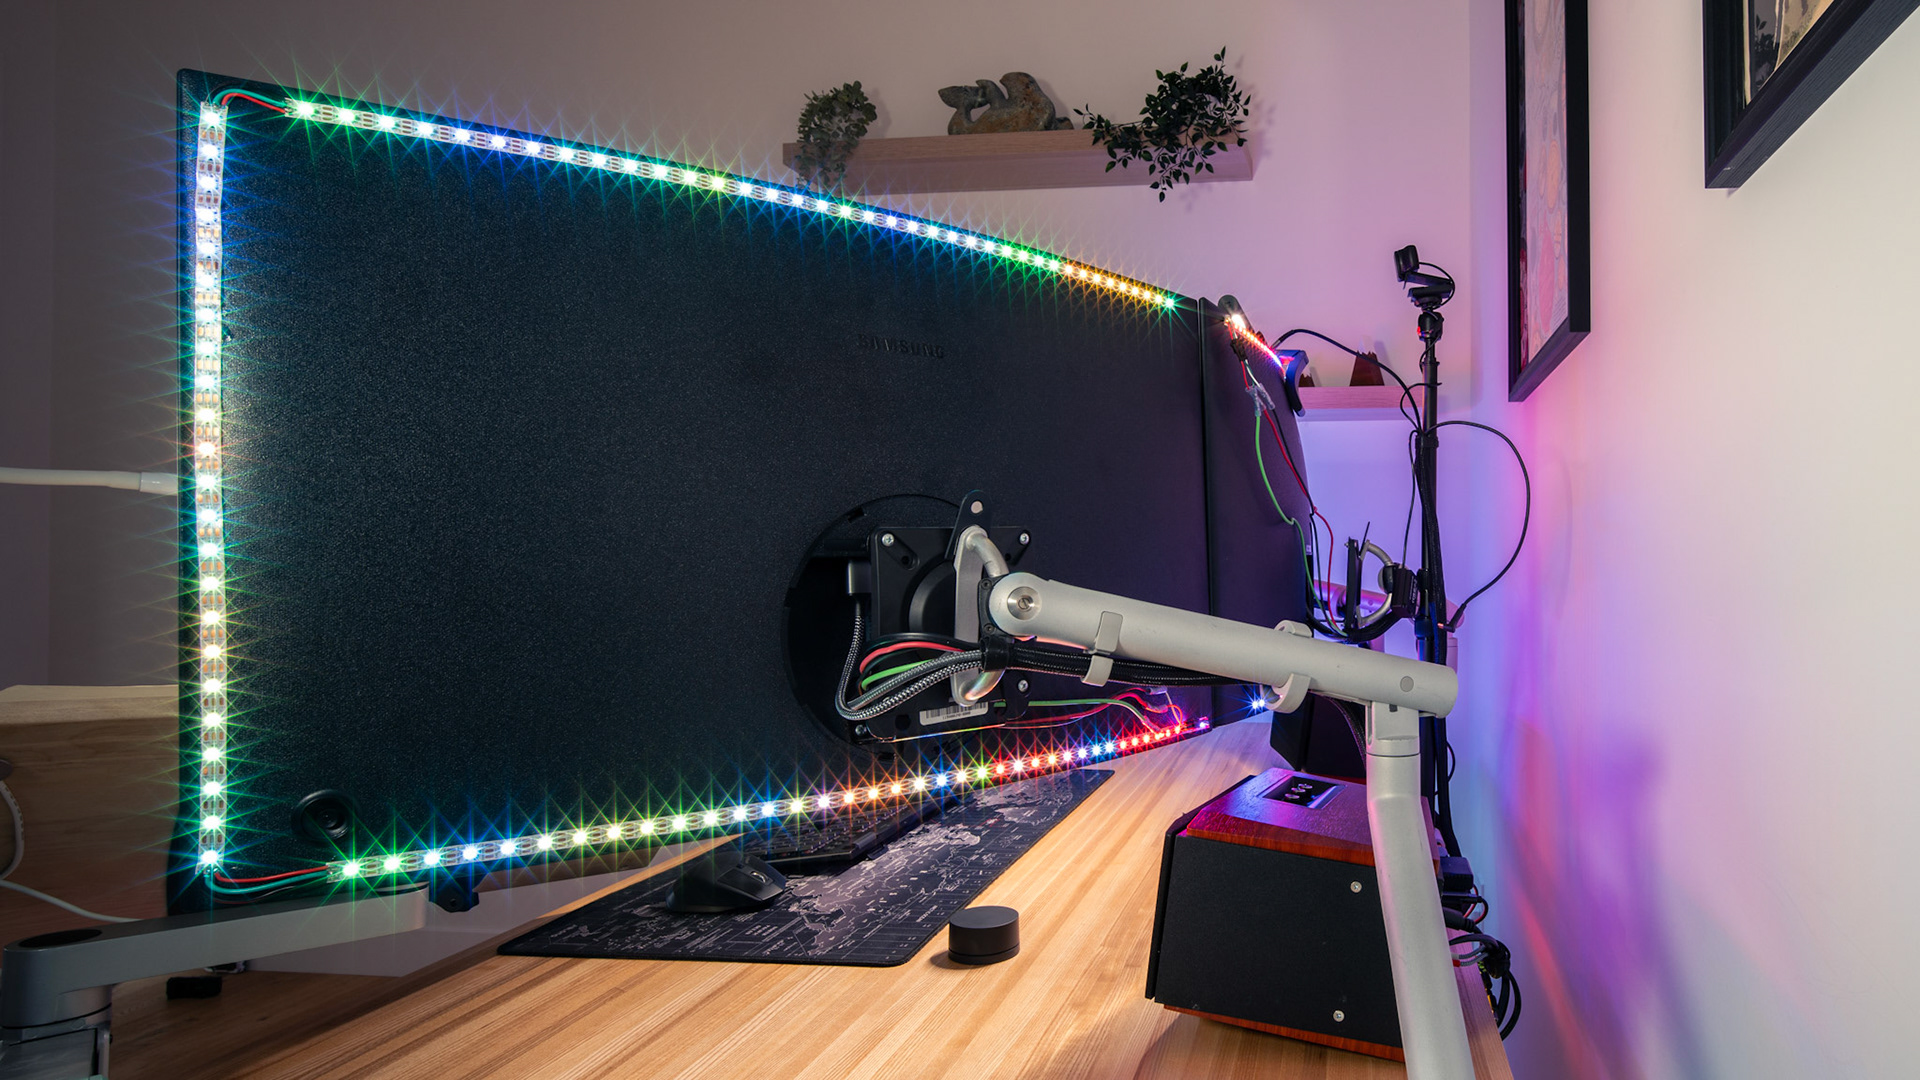
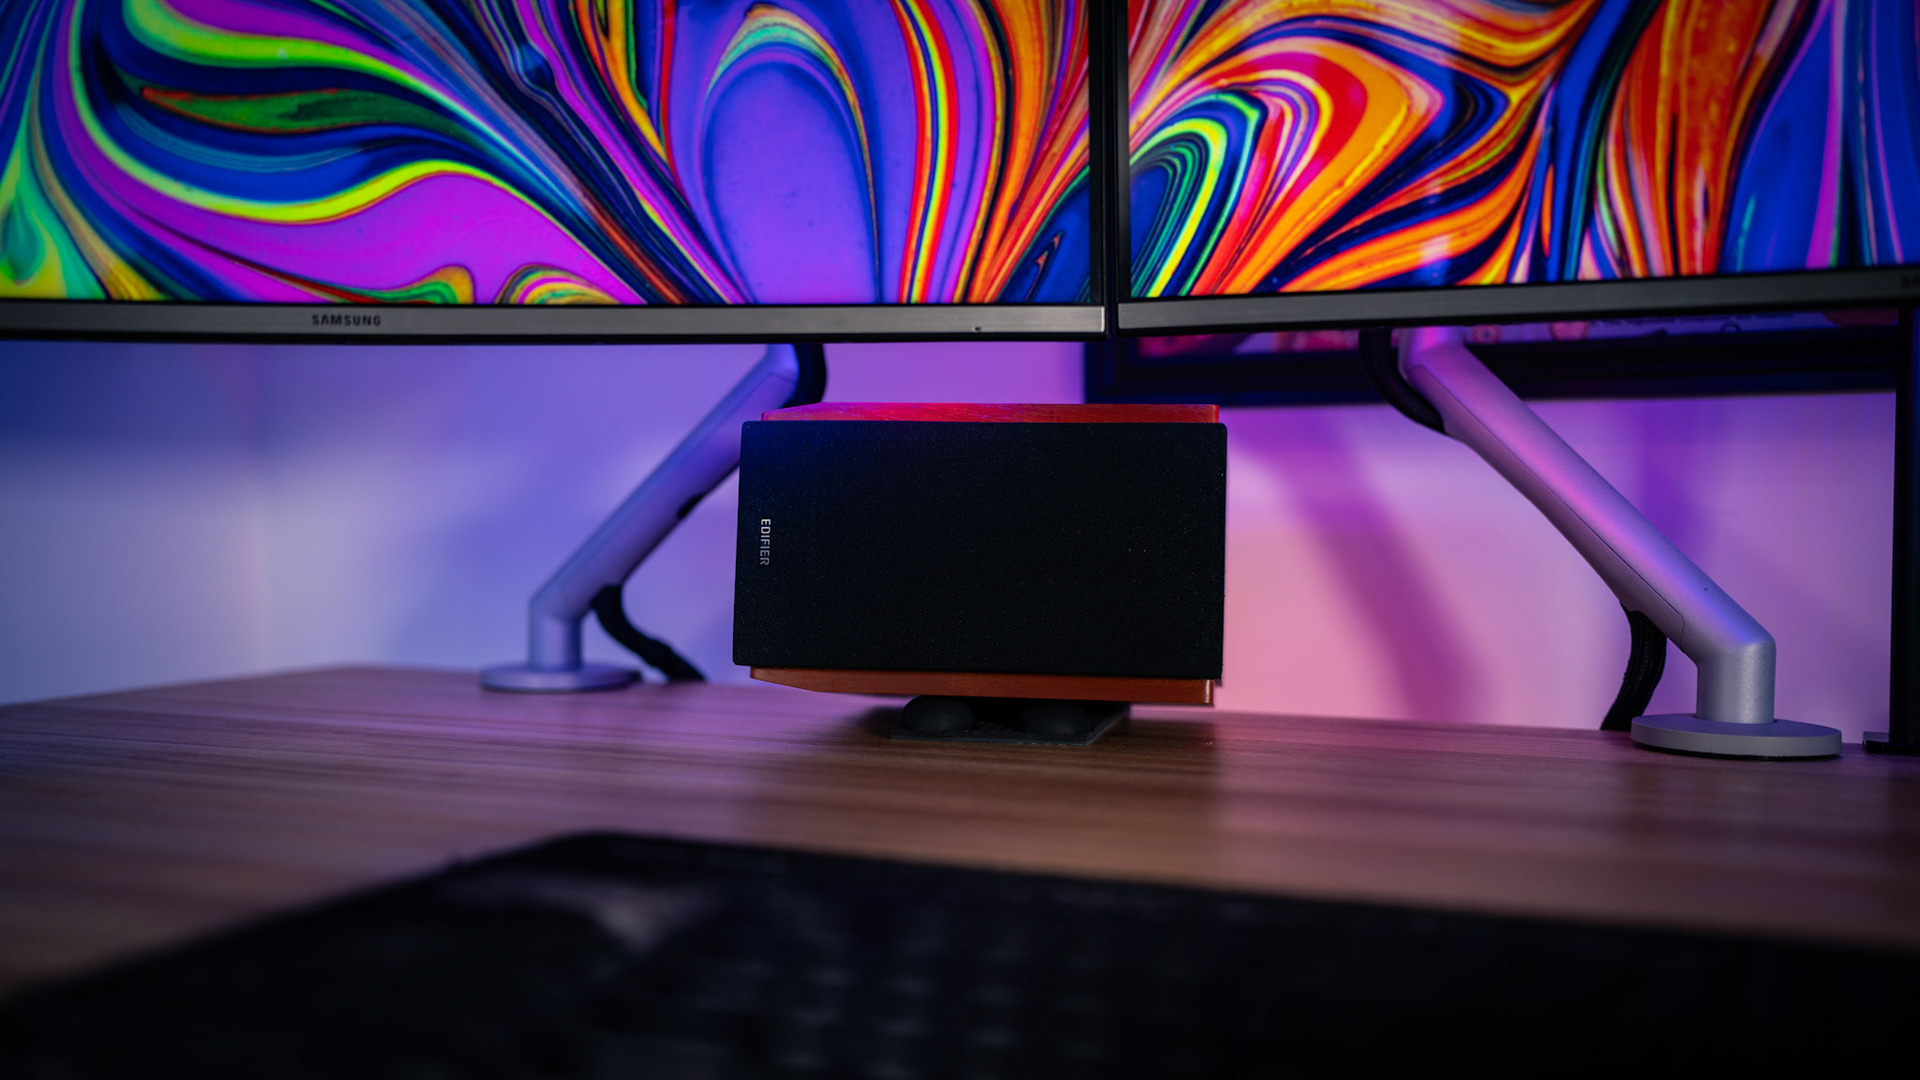
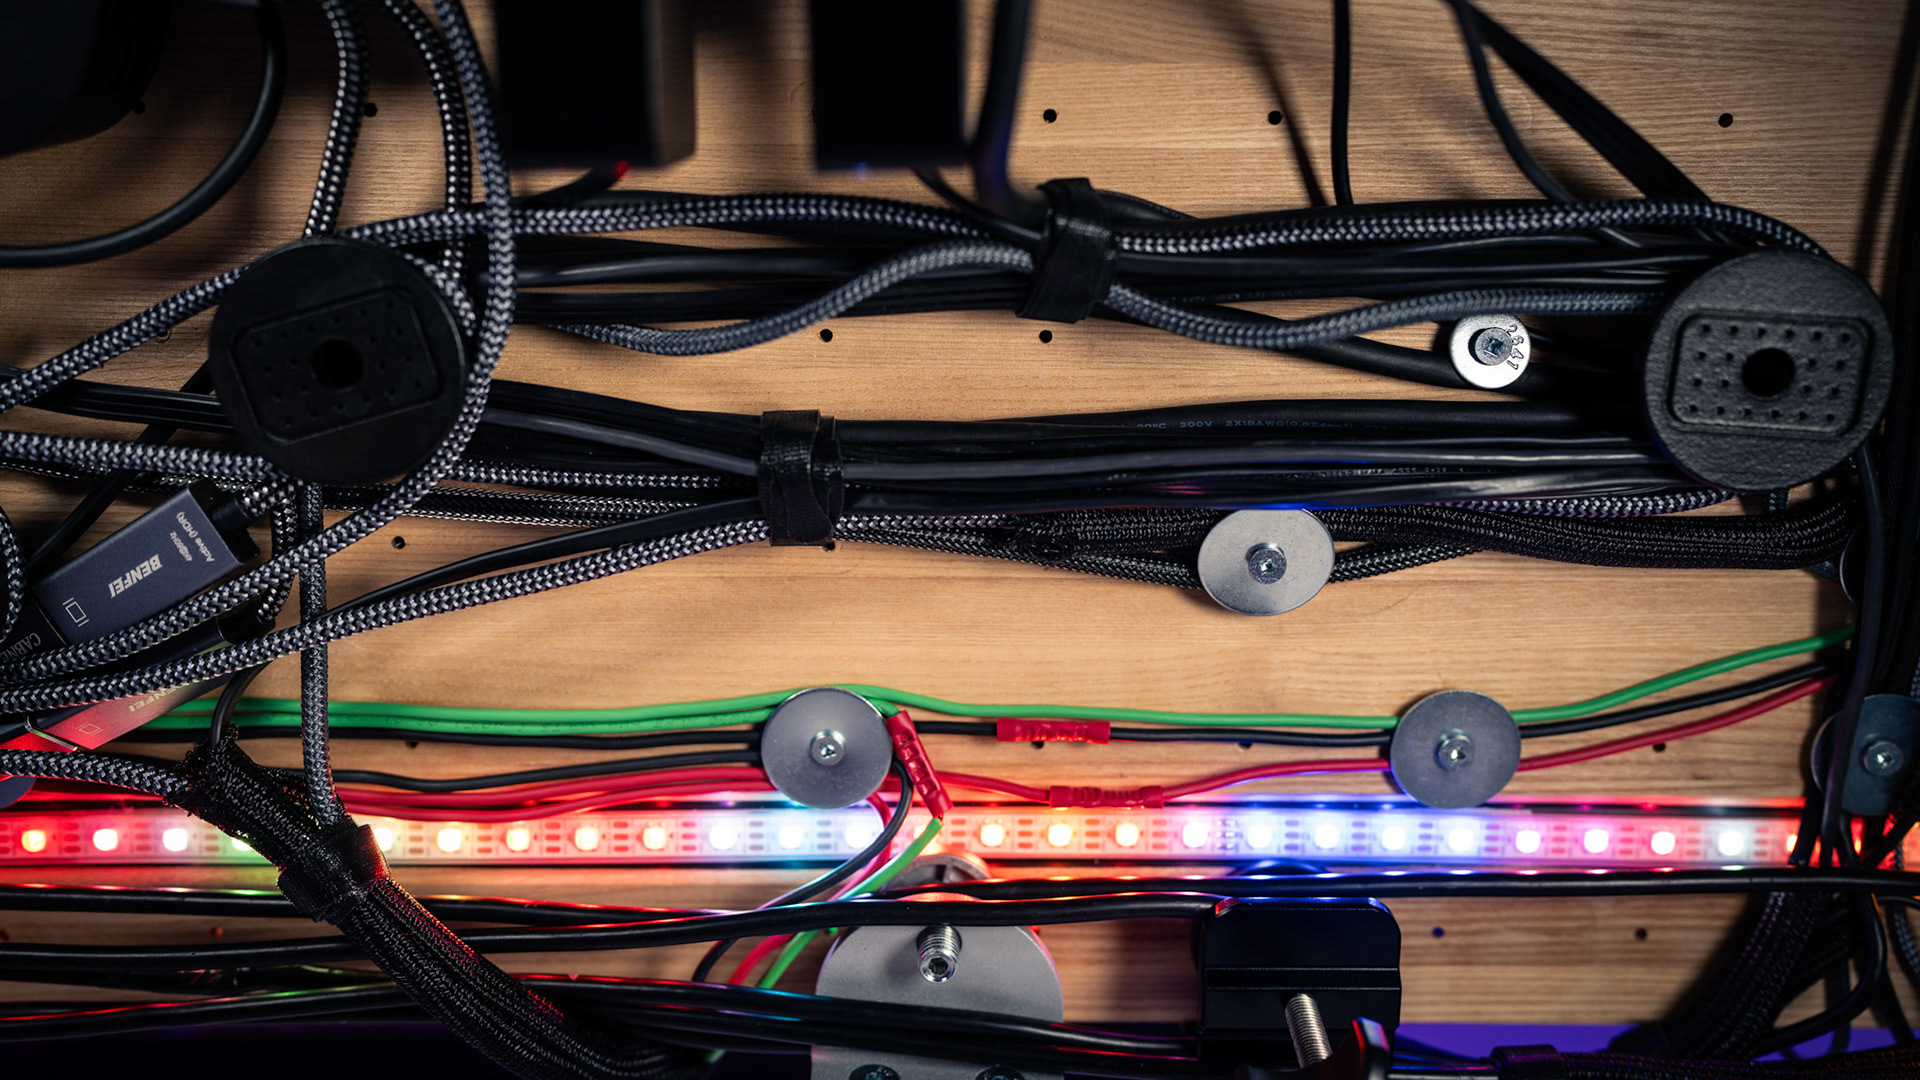
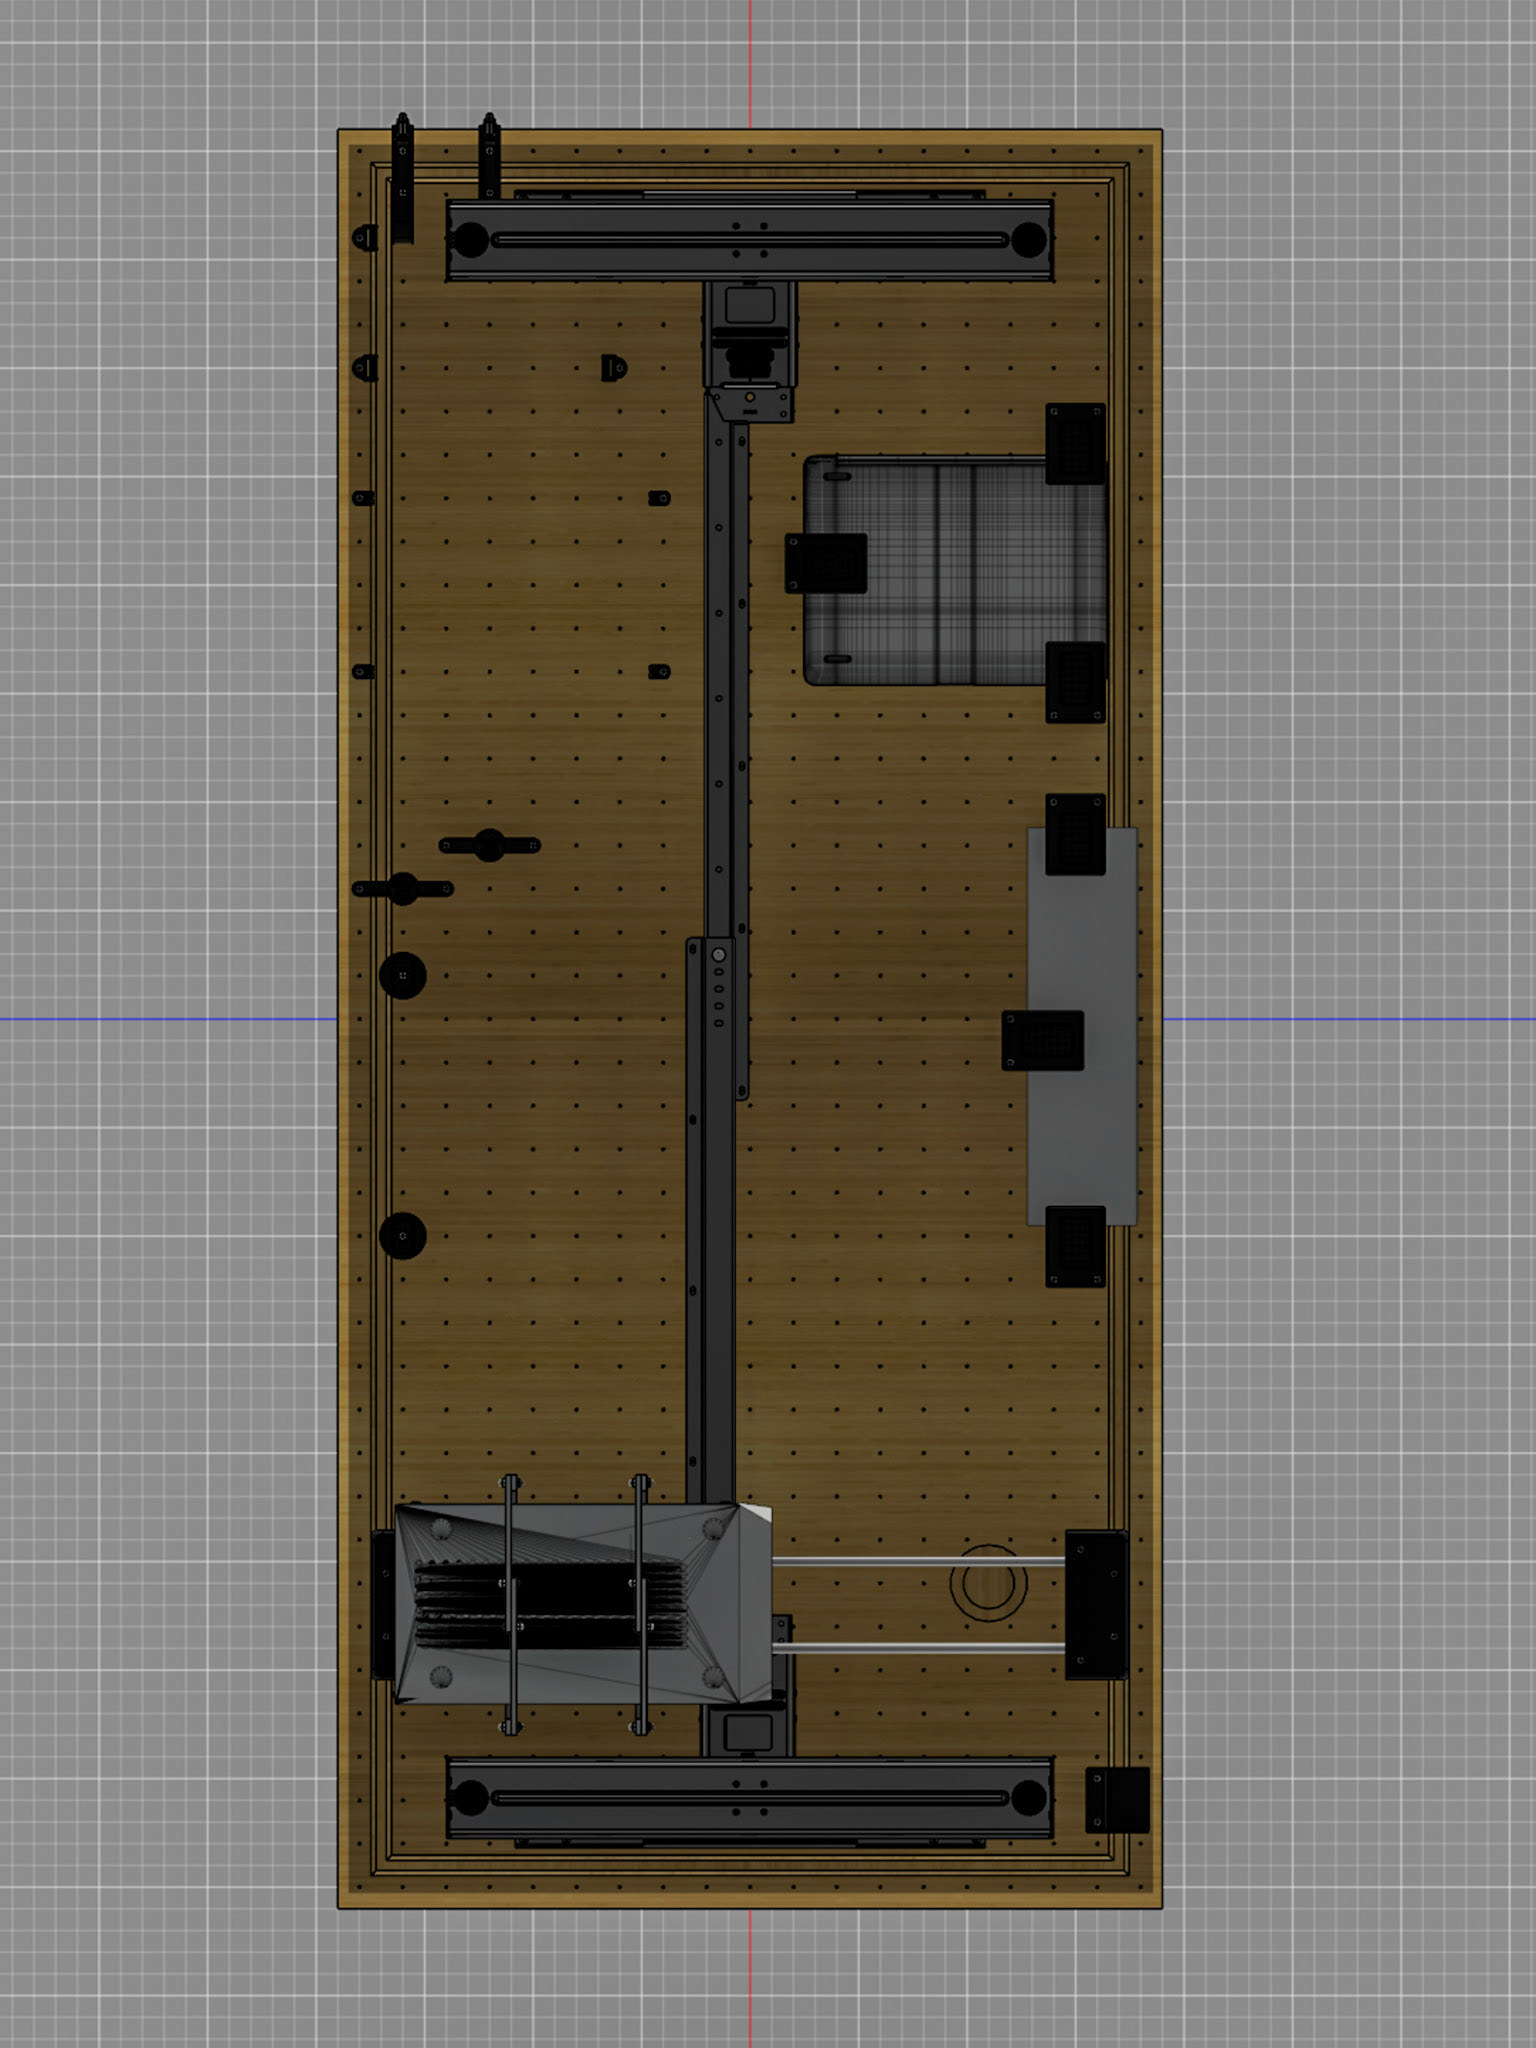
Here you can see how the individual LEDs sample the screen for a unique effect. On the installation side, while things ended up reasonably clean, next time I would use JST plugs and grouped cables for all my wiring. I would also use diffused lights of some sort, rather than the raw LEDs.

Because my work requires a lot of reading, I also used a monitor arm to create a custom book holder with a reading light mounted – this way, I read law and type at the same time. 

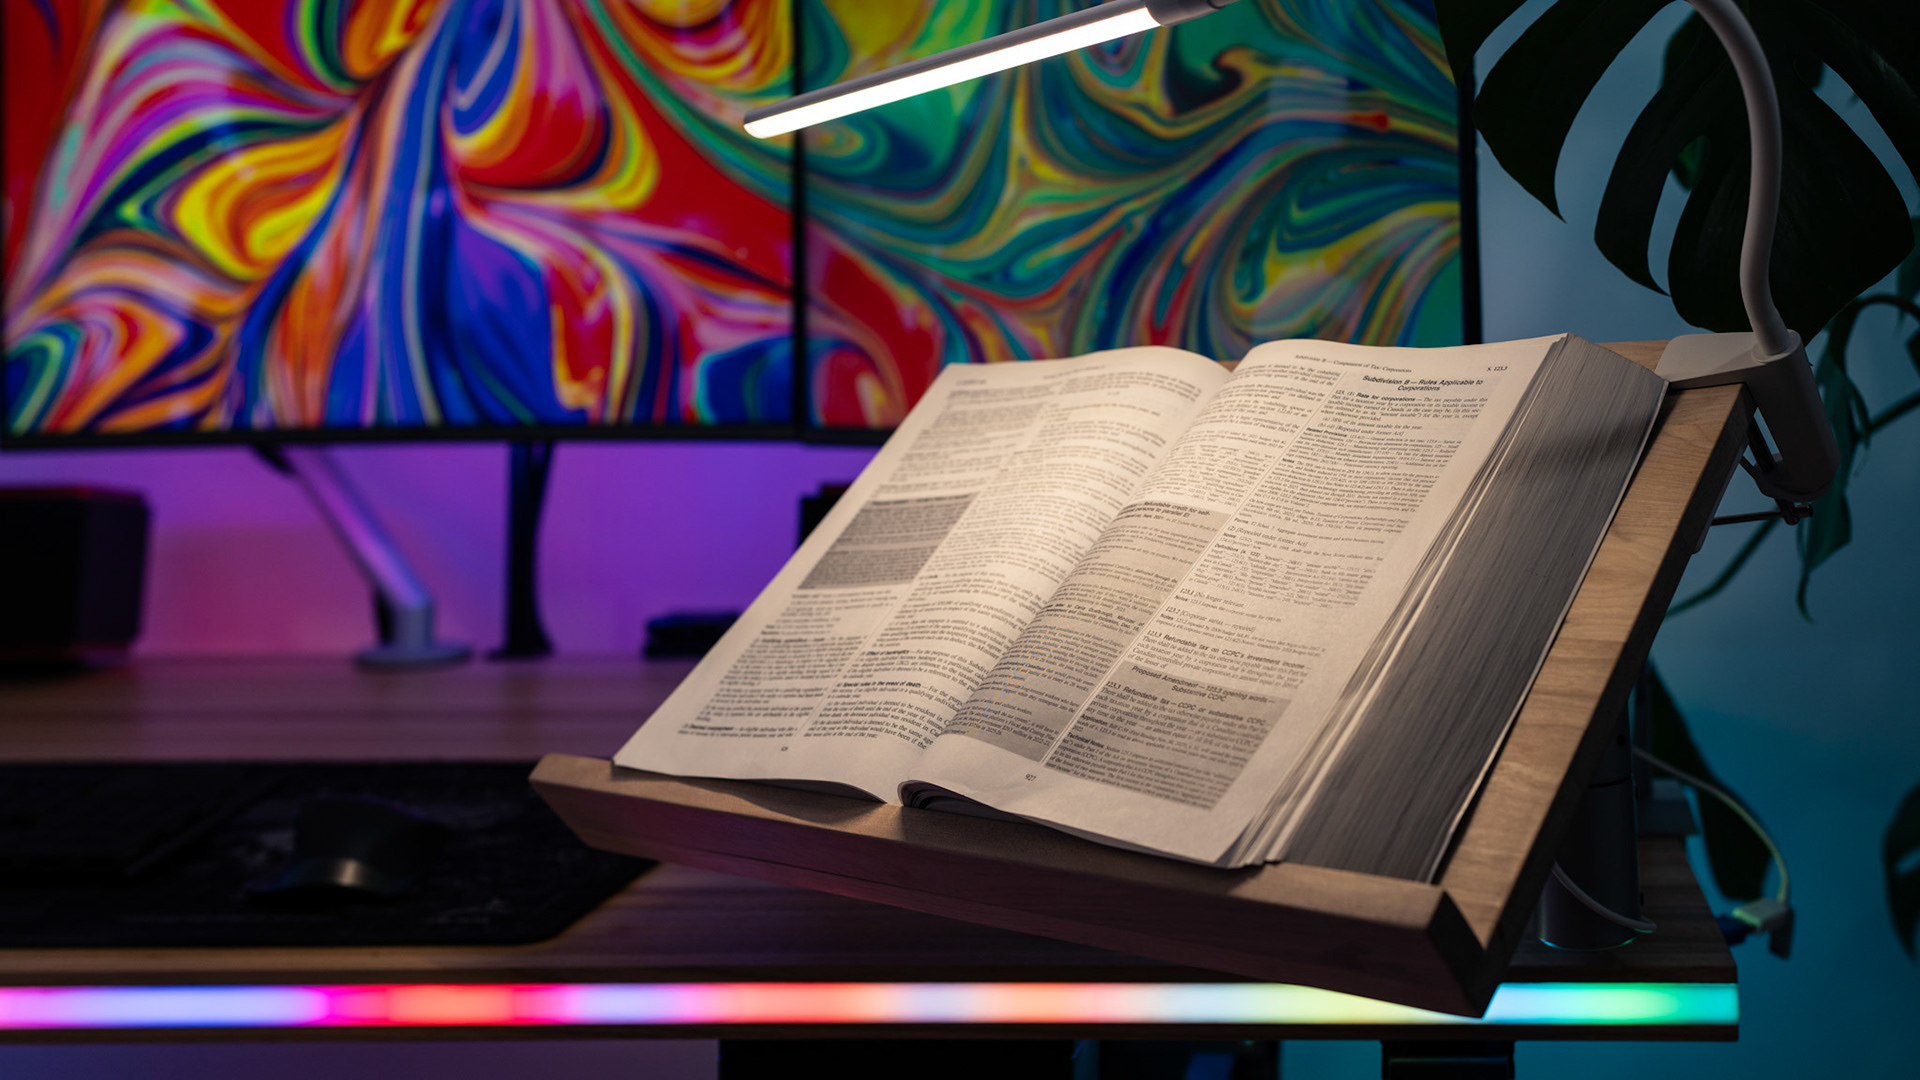
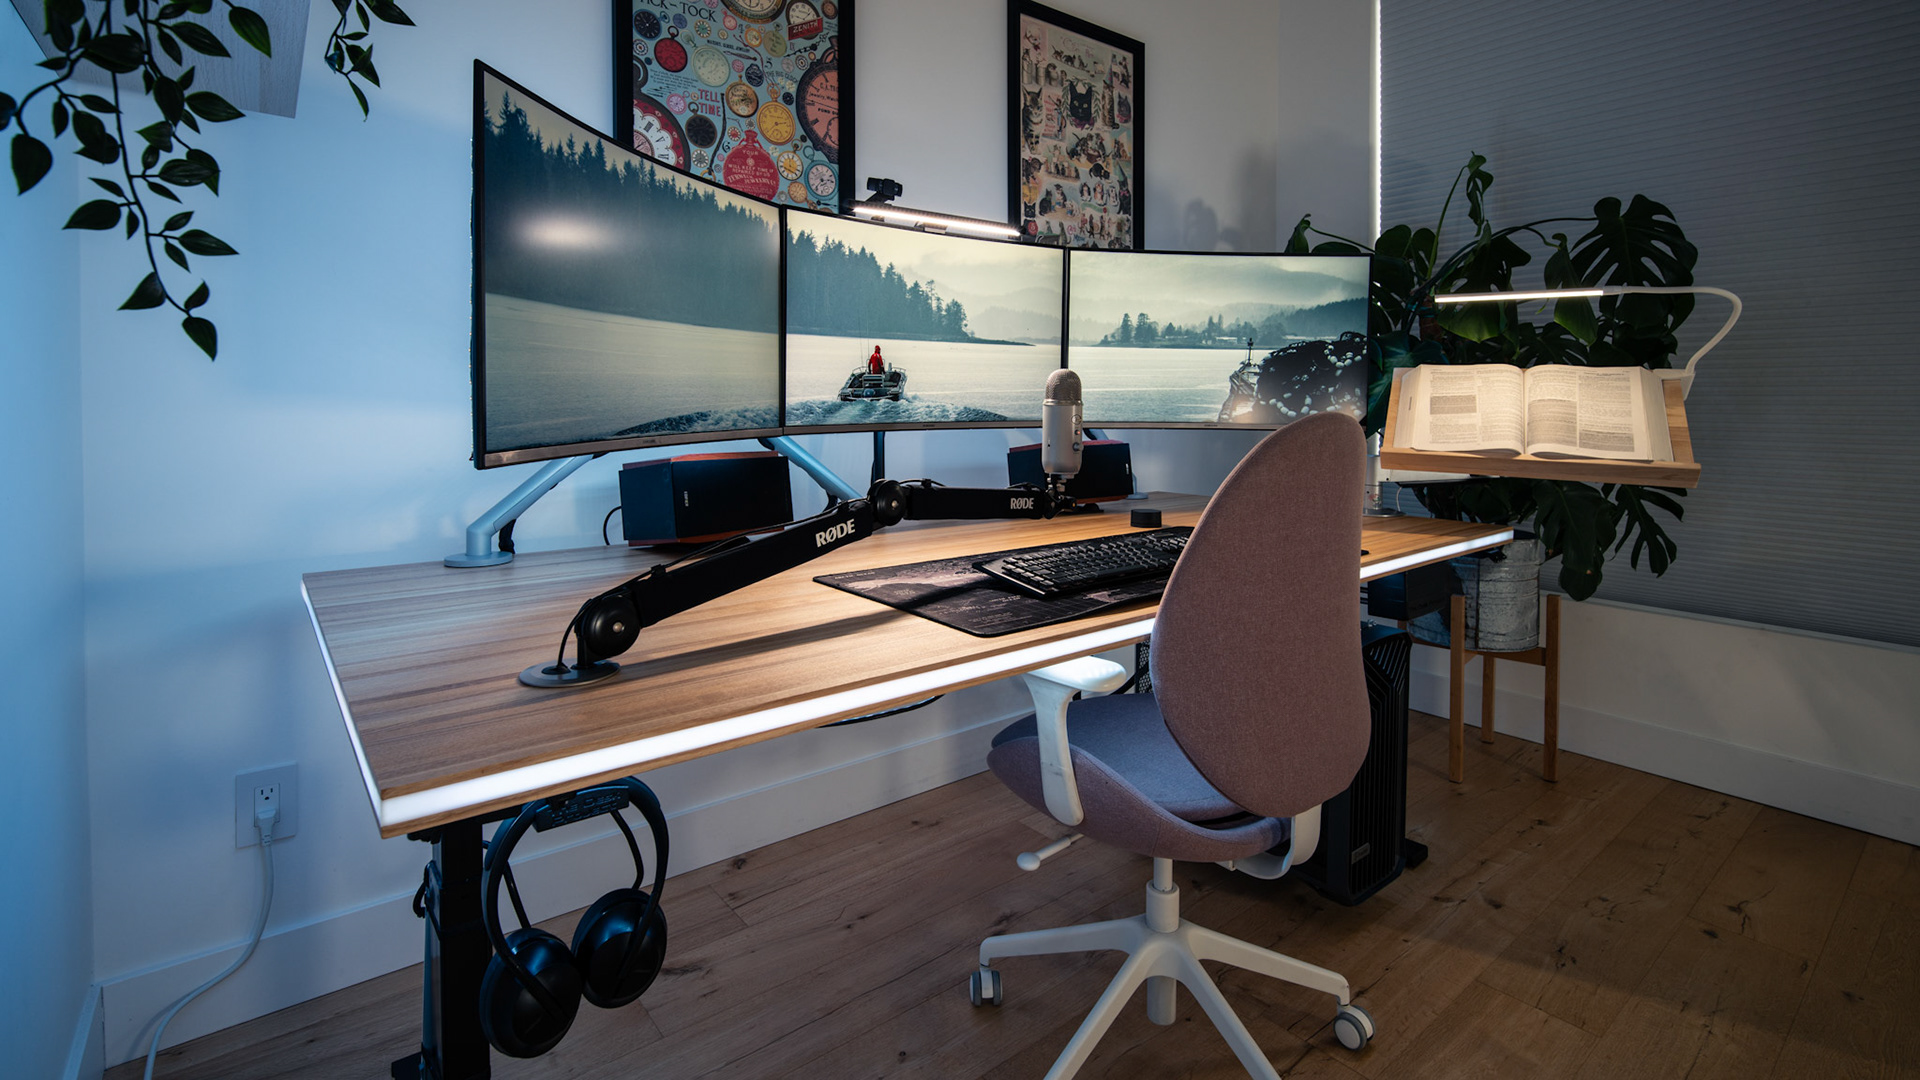
I simply made the wood piece and screwed it into the "laptop adapter" for a monitor arm, and it worked out nicely. The overhead light makes reading gentler on the eyes, and I can swing the text right to eye level so I can read comfortably and type. 

Ultimately, I think I met the design objectives:
Feedback Request
Feedback
Although everything went well and I can say I'm thoroughly happy with the end result, I already know what I would change if I could do it all again, and I've set out some of those ideas below.
My goal is to make a second version of The Desk, one that builds on the limitations of the original and that, maybe, could be manufactured. I would love to share The Desk with the world, but I want it to be perfect, and need help to this end. To this end, I would absolutely love to hear what features folks would want to see in their version of a perfect desk. 
Below is a very short survey where you can share your thoughts on The Desk Project, and, optionally, sign up to join a community of folks who are obsessed with functional workspaces!
Future Improvements
Below are the things I would change/improve:
Respecting LEDs
#1 - Using diffuser channels for all LEDs (not just the edge lights). This would make installation way easier and provide a much cleaner looking finish from all angles. 
#2 - Connecting all LEDs with grouped wires and JST plugs instead of soldering and crimping - this would make installation a breeze. 
#3 - Making LEDs easier to access. While I'm confident I can fix anything that goes wrong, it will take me longer than I would like. 
#4 - Find a way to leave some extra room to account for dimensional changes in wood - I did not leave enough room for expansion and contraction in this version.  
#5 - I would like to find a way to separately control the "groups" of LEDs (being 5, one for each monitor plus the edge and underside lights) using 1 board instead of 5 separate ones. I suspect this is possible but will need to look more. 
Respecting Accessories
#1 - I underestimated the sheer quantity of cables and the amount of cable slack that I would need to manage. I've already conceived of several improvements to the cable management system that I think will not only make it even easier to manage in the future, but be more aesthetic. Among these is a "block" system for routing cables through, and that would "pinch" cables in place so you don't need to work about putting stress on the plugs. I would also manage the cable slack on a "per cable" basis, so it's easier to add/remove cablers in the future. 
#2 - While the PC under-desk mount works essentially exactly how I had hoped, the metal "cage" that holds the PC could use some rejigging. I'm not a metalworker so only had rudimentary ability to design the cage the way I wanted, but the next version will have a "quick-release" option so the PC can be easily removed from the cage for work and maintenance. 
Respecting Wood 
#1 - I believe the only shortcoming here is the edge where my wrists sit: it's a little too sharp, so I would just add a ¼" roundover on the next turn. 
Specifications
Here are the specs on the various items. A lot of this equipment was acquired used (especially the more expensive items). 
Desk
-Material: White Oak
-Dimensions: 82" X 38" X 1.5"
-Legs: Linak Kick n' Click, DPG1M Desk Panel, DL6 Lifting Columns.
Computer
-Case: Fractal Torrent
-GPU: Nvidia GeForce RTX 3090 (TUF Gaming)
-CPU: AMD 7900X
-Motherboard: AS Rock PRO RS X670E
-Memory: Trident Z6 Neo, 2 x 32GB 
-Storage: Samsung 980 Pro 2TB, + 2x Ironwolf 8TB 7200RPM HDD
-Power Supply: Corsair HX 1200 
Peripherals Etc.
-Mouse: Logitech MX Master V2
-Keyboard: Logitech G915
-Mousepad: Not sure (amazon I think)
-Microphone: Blue Yeti (older version, several years old)
-Boom Arm: Rode PSA1+ 
-Webcam: Sony camera or Logi C920
-Light bar: Xiaomi Mi
-Speakers: Edifier RT1700BT
-Speaker Stands: Cut up squash balls and yoga mat
-Monitors: 3X Samsung UR59C 
-Lights: Neewer 660 LEDs (remote variant)
-Dock: HP Universal Dock G2 (USB-C)
-USB Hub: TP-Link Powered USB Hub 3.0 with 7 USB 3.0 Data Ports
-USB Switcher: (under desk) 1X UGREEN 10Gbps USB C Switch 2 Computers Sharing USB 2.3 Devices, (on desk) 1X an older UGREEN version. 
-Monitor Arms: 3X Herman Miller Arms
LEDs
-LEDs: SK6812 RGBW (neutral white)
-Wifi Board (5X): ESP 32 boards. 
-Power Supply: Mean Well UHP 500
-Fuse box: an automotive fuse box from amazon. 
Decorations
-Shelves: Ikea.
-Plants: the monstera was from marketplace, the wall plants are plastic from Ikea. 
-Art: posters purchased from a very fun store in Nelson, British Columbia.
-Everything else: from around the house.  
Thank you for reading!
Please feel free to reach out directly, too:
Submit
Thank you!

You may also like

Back to Top